Moon, Venus, and Mercury Conjunction

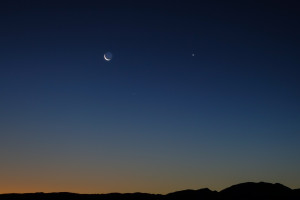
Back in early February, we had an interesting time from a planetary observation standpoint. All of the naked eye visible planets can be seen in the sky in the early morning. Jupiter is in the west, moving east we have Mars, Saturn, Venus and Mercury. On February 6, 1016, there was an old sliver the Moon that joined Venus and Mercury. I was able to get up early and get some images of that conjunction event.

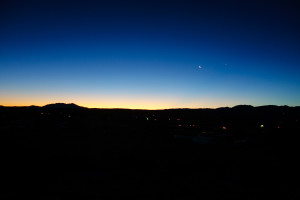
I was a totally clear morning. A little chilly at 40 degrees F with a fairly strong 10-15 mile an hour wind from the east. It was bracing and beautiful. The first shot is a close look a the three objects, the second a wider view of the Anza valley with Santa Rosa Mountain and Toro Peak on the left.

Venus on the right, Mercury on the bottom, and the Moon at the top left.

Venus on the right, Mercury on the bottom, and the Moon at the top left.

Conjunction Wide

Conjunction Wide

Moon Events Calendar File

UPDATE with 2020-2021 file at the bottom of this post

I like to have the dates and times of the phases of the Moon in my calendar. Years ago, I found a site that provided a vCalendar format file that I could import into Outlook. Unfortunately, the data from that site ended on December 31, 2015.

Fortunately for you, I can provide an update. For those who just want the vCalendar file, you can download Moon-Events-2016-2017.vcs. That file contains calendar entries for all the Moon Phases in 2016 and 2017 and can be uploaded into Outlook with the following steps (this is from Outlook 2016 / Office 365):

  1. Go to File > Open & Export > Import/Export
  2. Select “Import from an iCalendar (.ics) or vCalendar (.vcs)” and click “Next”
  3. Change the file type in the Open dialog to “vCalendar format (.vcs)”
  4. Navigate to where you saved Moon-Events-2016-2017.vcs, select the file, and click “Open”
  5. Select “Import” to import the calendar entries into your calendar

Now I will describe how I made the vCalendar file. I first went to the United States Naval Observatory website, specifically to the Phases of the Moon page from the Astronomical Applications Department. From the Moon Phase page, you can generate up to 99 Moon events which are displayed in your browser.

I took that text and pasted it into a spreadsheet. Using Excel text functions I parsed the data so I could build up the required vCalendar syntax. That meant changing the text from the USNO:

Last Quarter 2016 Jan 02 05:30

Into the required syntax for a vCalendar entry:

BEGIN:VEVENT
DSTART:20160102T053000Z
DTEND:20160102T053000Z
SUMMARY;ENCODING=QUOTED-PRINTABLE:Last Quarter
PRIORITY:3
END:VEVENT

Each of those went into a text file and I added a header:

BEGIN:VCALENDAR
PRODID:-//Aschlei//MoonEvents//EN
VERSION:1.0

And a footer:

END:VCALENDAR

I then saved the text file with a .vcs extension and I was able to import the events into Outlook. You can import it into other calendars like Google calendar, but they come with Moon events built in so it generally isn’t necessary.

You can download the Excel file I used with the text parsing and concatenation, Moon-Events-2016-2017.xlsx, if you’d like to try it yourself. I’ll probably download it in late 2017 when I need some more Moon events.

I hope you found this useful.


UPDATE December 26, 2017

I have created a new vCalendar file for 2018-2019. You can also use the updated Excel file too.


UPDATE January 29, 2020

I have not been able to get an updated calendar file done for 2020-2021 as the USNOA web site is offline for updates until April 30, 2020.  I am searching for another data source. I found a source for the data and have uploaded a new VCS file.

Astronomy Goals

I haven’t had much time or focus on astronomy for, really, the past year. Many reasons. So in this post I will set forth my astronomy goals for the year ahead.

  • Install and image with the new camera
  • Take many solar images with the Lunt scope
  • Image Saturn
  • Start setting up the original Observatorio de la Ballona for narrowband imaging with the ST-10

And so, there it is.

Some Astronomy Progress

It has been a fairly crazy couple of months for me and all the others at my company. And there is much work ahead. This work led to missing a month’s post: There was no post for December 2014. But I won’t miss January 2015.

Over the last two weekends, I actually made some progress with upgrades to the observatory. First of all, it got a thorough cleaning. A movable roof does not seal tightly, so there was plenty of red Anza dust everywhere. It is now in tip top shape. Birds occupying the roof motor housing prevented any observing that first weekend of work. I was able to put the self guiding filter wheel on my new SBIG STXL-6303E camera. A step forward!

On the long Martin Luther King Jr. weekend, I was able to test out the current set up. Everything worked fine even if I was forced to shut down early due to high winds. I also installed the filters (Astrodon LRGB, Ha, SII, and OIII). And I connected the camera to a computer and it worked.

The real tests are ahead, when I rebuild the setup of the last two years and get it tuned for easy use. That is many weekends of work. I am looking forward to it.

Changes at SBIG

This is old news, but I feel compelled to mention it.

Back on October 1, 2014, Diffraction Limited, creators of Maxim DL, acquired Santa Barbara Instruments Group (SBIG).

Diffraction Limited, a company well-known for its Cyanogen brand astronomy products, including MaxIm DL imaging software, today announced the acquisition of the assets of Santa Barbara Instrument Group Camera Division of Aplegen, Inc. As part of this acquisition, Diffraction Limited is assuming all responsibility for manufacturing, product development, customer service, repair and warranty support.

Several years ago, SBIG was acquired by Aplegen, Inc,. a medical imaging company. I figured this was a way for the founders to get some of their money out of the company and a basis for continued growth. SBIG has continued to produce good products and new innovations.

I am hopeful that this new change in ownership is a good thing. Doug George, owner of Diffraction Limited, is a good guy. I’ve met him several times at the AIC in San Jose. Others I have communicated with believe this is a good thing for the company. And that is good for imaging, because SBIG consistently has set the standard for astronomical cameras.

Sun Images with New Solar Scope

A few weeks back I acquired a new, dedicated solar telescope. It is a Lunt LS80 THa with the double stack module. I admit that I was attracted to solar scopes by the Coronado line of telescopes, purchased sometime back by Meade. Upon doing my research, I learned that the Lunt line is made by the founder of Coronado and manufactured in the United States. I purchased from Anacortes Wild Bird and Telescope, a fine establishment with an excellent staff.

Of course I wanted to take images. My first attempt was not worth posting outside of Facebook. And when I tried again, I had more follies with video format. For all programs, RGB24 is a large file, but a good, uncompressed format. And it works.

For this effort I acquired a new camera off of Astromart. It is am Imaging Source DFK 31AU03. It has a 1024×768 CCD, and worked very well for what I wanted to do.

I processed the 2,000 frame videos in Registax, AstroStakkert, and AviStack. AviStack was the slowest, but it produced the best result, based on visual assessment. I am sure all of these programs are good, and I am a beginner on all but Registax. From there, I moved to PixInsight. I only aligned and stacked the images in these programs. All real enhancement was done in PixInsight.

In PixInsight, the real enhancer was deconvolution. I used modified Lucy-Richardson with a combination of 3.0 and 3.5 StDev PSF, with 200 iterations. More the better I always say. Before deconvolution, I doubled the pixel size of the image. I did use HDR transform to add some contrast, but I weighted the deconvolved image more using pixel math. I am happy with the results. Some minor finishing was done in Photoshop.

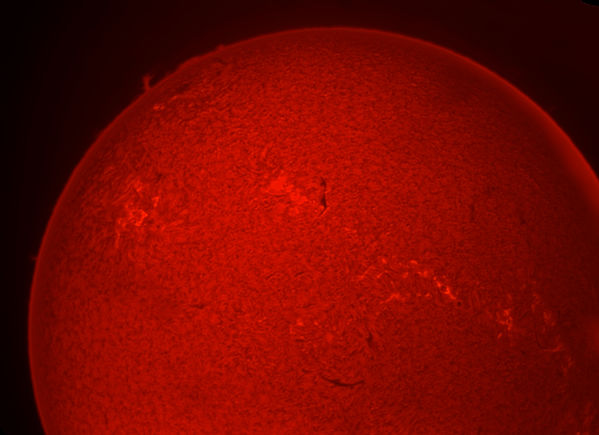
Here is the first image. I stretched out the image with a mask to show the prominences on the rim of the Sun. It did tweak part of the limb, but I think it looks good.

The Sun

On the second image, I tweaked the color in Photoshop to brighten it up a bit. I think it reveals the details of the Sun better.

The Sun

In Praise of Astromart

I had some used astro-imaging equipment I wanted to sell, so I went to the premier on-line marketplace for used astronomy equipment, Astromart. I have sold items through the site before. It is a really good marketplace for astronomy equipment.

I sold two items, an SBIG STL-11000M and the 8-position filter wheel for the STL-series cameras, the FW8-STL.

I sold the STL-11000 first. I had replies to the add almost immediately. I had a request for a dark frame from the camera that resulted in a funny comment. The person to whom I sent the dark frame commented that it looked “noisy.” Since a dark frame consists only of the record of thermal noise on the chip, what else is it going to look like? Particularly a single 5-minute frame. I was amused. The sale was completed with in a couple of days.

When I listed the FW8-STL, I received a responses within minutes. Clearly this is a widely sought item. If any of you have an FW8-STL for sale, I bet you can get almost the original full retail on it, which is $1,195 (I did not charge that much). That sale is completed with the FW8 off to Australia.

Anacortes Wild Bird and Telescope does a great job keeping Astromart going. My experience there has been consistently good. It is well worth the annual membership fee. They are great to do business with as well. I have purchased several items from them. They provide excellent, knowledgeable service.

Astronomy Software – Part 3: Image Processing

This is the third and final in a series of posts on astronomy software. The first post covered mobile software and the second planning and imaging. This post deals with image processing software.

  • MaximDL
    When I first started imaging, Maxim was my go-to program for data reduction (removing noise, optical train artifacts, and chip artifacts from an image) and image combination. It has a strong set of tools and a fairly easy workflow. It also has the advantage of not being another tool as it is a premier camera control and image capture tool as well. I used Ron Wodaski’s bloom removal tool as I have an ST-10 and blooms are an issue for me.
  • CCD Stack 2
    CCD Stack 2 provides a very intuitive way to understand data reduction and statistical combination of images. You can easily browse through you stack of sub frames to identify bad frames. It has excellent bloom removal. The options for statistical noise removal are excellent. There are tools to automate the processing flow, but I have not used them.
  • PixInsight
    PixInsight is simply an amazing piece of software. Coded from the ground up as an end-to-end astronomical image processing tool, the depth of functionality and tools available for images are excellent. I now do essentially all of my image processing in PixInsight. The data reduction and combination is a little labor intensive, but there are scripts (which I haven’t tried) that can help automate the flow. The tools for gradient removal, background neutralization, color balance, and contrast adjustment (HDR transformation in particular) are absolutely invaluable. I cannot say enough about the quality and capabilities of this tool. The learning curve is steep, but worth the effort. It is multi-platform, available on Windows, Max, and Linux 64-bit platforms.
  • Photoshop
    No discussion of astronomical imaging programs could be complete without mentioning Photoshop. This highly-capable general purpose image editing tool is a professional standard. Many tutorials have been written on using Photoshop for astronomical image processing so there are many resources for learning how to use the tool. For my use, PixInsight, with its large array of astrophotography-specific capabilities, has replaced most of my use of Photoshop. But Photoshop is clearly a top-line tool.

Image: NGC 1530

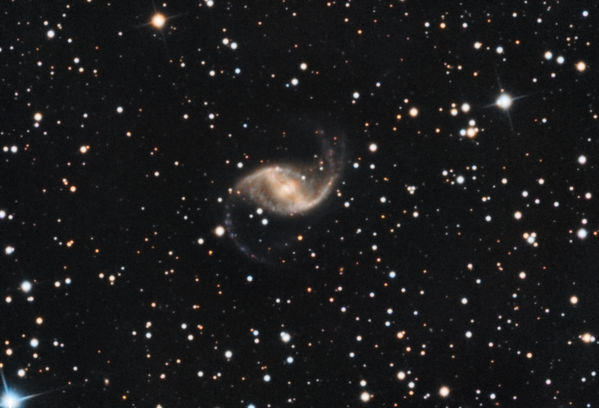
After the rush of holiday activities subsided, I managed to get one night’s worth of imaging done on December 30th. My target was NGC 1530, a barred spiral galaxy in the constellation Camelopardalis. It is located near the north celestial pole and only reaches 48° altitude at transit. I started imaging when it was about 43° altitude. It is fairly dim at magnitude 12.5 and small, with a major axis of 1.8 arc minutes.

The night was dry and cool. The temperature fell from about 45° F at sunset to about 29° F when I shut things down at 1:30am. The dew point was below 10° F so dew was not a problem. Set up and imaging was fairly uneventful. Thankfully everything worked (unlike the last time I was out, but that’s a different story).

The image was taken with a Planewave CDK 12.5 scope and an SBIG ST-10XME camera on an Astro-Physics AP1200 mount. I took 150 minutes of luminance and 45 minutes each of red, green, and blue in 5 minute sub-exposures. Data capture and camera control was done with Maxim DL. Automation from CCD Commander. (See my post on planning and imaging software.) I calibrated and processed the data in PixInsight.

With this dim object I could have used more exposure time. The color is a little noisy. Overall I think it is a nice image of an interesting galaxy. A full sized image is in the photo gallery.

NGC 1530

Missed E-mail: Observatory Plans

I received an e-mail this morning asking for plans for my observatory.

I do have the plans and am willing to share them.

When I went to forward the email to my “real” e-mail account, I neglected to copy the sender. So I don’t have the e-mail address of the sender and cannot respond.

If you are that person, please contact me again and we can discuss sharing of the architectural drawings.