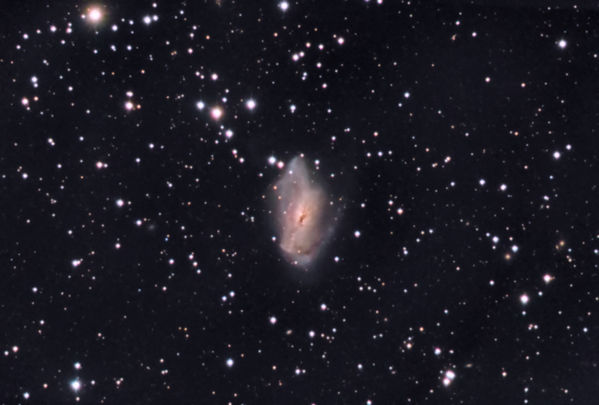
NGC 2146

A month or so ago I finally got around to processing some data I took last November. The target was NGC 2146, a spiral galaxy in Camelopardalis undergoing some serious disruption. My data capture was problematic. Due to CCDCommander’s retention of prior settings when creating a script (this is not a bad feature), I took most of my luminance data binned 2×2. Probably not a bad idea as seeing wasn’t that great, but not what I had intended. In trying to recover from this error, I did not get adequate color data.

I did all of my alignment and combination processing in PixInsight, and had a good learning experience there. The main one is to make sure to use the optimize function on the darks. All in all, even with the data challenges, the image turned out OK.

Here is the final result:

NGC 2146

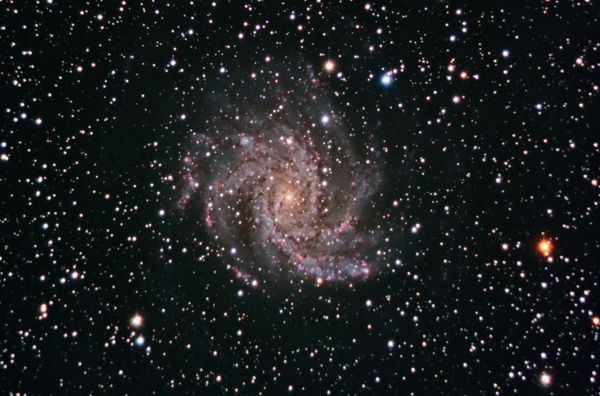
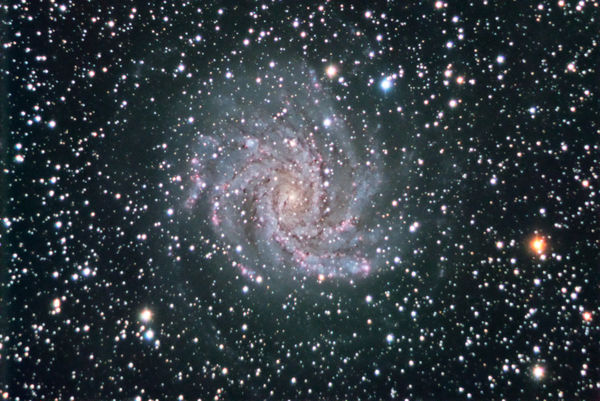
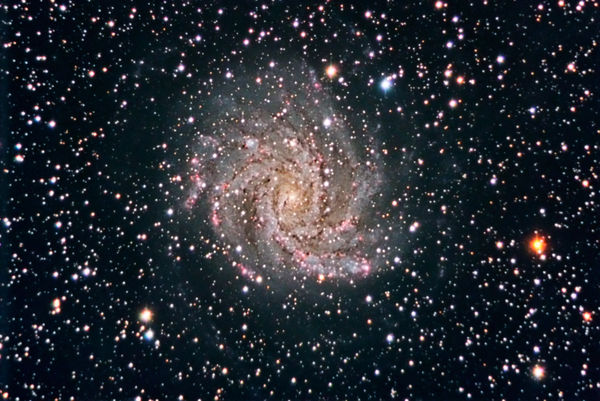
NGC 6946 — Three Versions

I collected data for NGC 6946, a spiral galaxy in Cepheus, in July and again in September. The color data from July was very suspect and I did not like either version I produced at the time. I took more color data in September and added it to the mix. The final result is below. I like the color but if I go back to it I will stretch the luminance a bit more to bring out faint details in the extended area.

NGC 6946 V3

I did use Bob Franke’s eXcalibrator software to get the core color balance. It was very helpful.

Here is version 2. More stretched in the luminance, but the color I don’t particularly like.

NGC 6946 V2

Finally, version 1. I think you’ll agree the color and details here just don’t work very well.

NGC 6946 V1

Earth Moving on APOD Returns

Last night at AIC I made an off hand comment to Mike Hernandez of Sacramento Mountains Astro Park about earth moving equipment being an Astronomy Picture of the Day. And what do you know, it shows up again.

First seen on November 22, 2006, the giant piece of mining equipment showed up again today.

Jerry Bonnell and Robert Nemiroff did do a great job featuring AIC imagers during AIC. That was much appreciated.

But I do wonder what the joke is with the big earth mover.

AIC 2010 Day Three

AIC 2010 day three started off with a fine breakfast. The food is definitely upgraded. Two presentations this morning.

First was Al Kelly talking about the importance of proper color balance in your source data, and using G2V stars to calculate it. A significant point he made was that an after the fact Multiplier correction is not enough to fix a big difference in color balance in source data because the signal to noise ratio won’t match. To calculate the balance, pick a high G2V star, take 5 short images of each color each color, dithering, calibrate, register, and stack with a mean combine. Measure the flux of the star (Maxim, AIP) and use this to calculate the balance.

The second talk was Martin Pugh speaking about High Definition Imaging. Strong emphasis was put on on equipment optimization. Use CCDStack FWHM measurement to pick best frame for the master for all subsequent aligns. And most of all, discard bad data! As others have Suggested, increase the contrast of a and b in the Lab color space to increase saturation. I also learned that there is a Photoshop edit log you can turn on in preferences. That will record all of your image edits.

Both of these presentations, in fact all of the presentations, will be worth looking at later once they are posted.

Many good door prizes were handed out—thanks to the sponsors. And you must be present to win!

AIC 2010 Day Two

AIC 2010 day two is about to start. I’ll see if I’m able to live blog the event through the WordPress iPad app.

Update 10:15am PDT
Excellent morning sessions so far. Russ Croman received the Hubble award and went through a processing example. The key points I took away: The darker your sky, the longer your exposure time. A dark location challenges you to go very long to really get depth in the image. He also discards one half to two thirds of his data, keeping only the best frames.

Rogelio Bernal Andreo gave an excellent talk on wide field processing in PixInsight. It was good to hear about something besides Photoshop. He emphasized the need ton make the basic steps on an image (e.g., gradient removal) on the linear image. He also made great use of wavelets to do multi-scale processing. For example, retaining layers 1 and 2 to only capture the small stars.

Update 1:00pm PDT

Todd Klaus of NASA’s Kepler mission gave a great presentation on the instruments and data gathering process of this planet-finding mission. The data calibration process is really impressive as they pull multiple layers of noise away from the data.

A fine lunch followed.

Update 4:39pm PDT

Quick update on the afternoon. Good information from the Founders Presentation. Adam Block has a great new 32 inch telescope on Mt. Lemon. The Mt. Lemon Sky Center has to be on the visit list as soon as I can make it. We got the full story of the making of the new Hubble 3D movie.

Kevin Nelson of QSI gave a good presentation on FFT transformations. But he started with a forecast on CCDs. We are getting to the limit on size of chip since that drives all other factors — scope, mount, camera size, filter, etc. Look for smaller pixels. On FFT, a way to look at the frequency of items in an image, similar in concept to wavelets. A powerful image analysis and processing tool.

Just getting a nice overview of work from Michael Joiner of BYU. He runs the West Mountain Observatory that sits near Utah Lake.

Bob Fera coming up now.

Update 5:00pm PDT

Bob’s key points: Don’t clip your blacks, protect stars when sharpening, and try out eXcalibrator a G2V calculator.

Finally, John Smith of CCDSoft on the Alsubai Project, an automated exoplanet search. Very cool project using off the shelf components. A 40 degree square coverage. 10 class A candidates for exoplanets. Wow.

All for today!

AIC 2010 Day One

AIC 2010 under way from a new venue, the Hyatt Regency Santa Clara. Apart from some problems last night with hot water, it seems to be quite nice.

My first session was Stan Moore and CCDStack. Lots of good imaging theory as usual. Essentially, normalization of images is critical for proper data rejection. This involves both equalizing the bottom point and the slope of the brightness in the image. He also recommends using dark adjustment in software, based on a library of good darks no more than 5 degrees C from the images. Lots of darks with long exposures. Stan is very concerned with read noise as a contributor to overall noise in an image.

The second session is Tony Hallas on advanced Photoshop techniques focused on adding narrowband data to RGB images. Several ways to take colorized, via hue / saturation, images on top of the RGB image.

Off to the exhibition hall!

A quick update to complete day one. Neil Flemings presentation on narrowband was excellent, and Brad Moore’ talk on the imaging tran was very good as well. The evening program was nice after a good dinner, and I am looking forward to the new Astro-Physics command center application.

Processing the Bubble Nebula

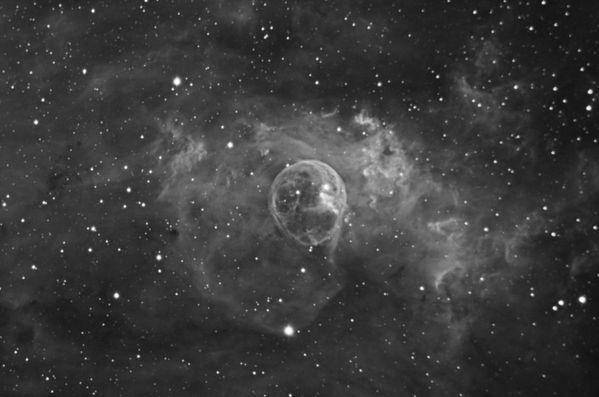
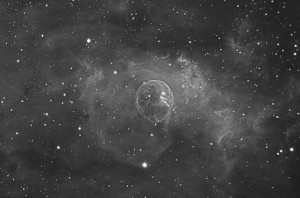
Back in September I took 3 hours of Hydrogen-Alpha (Ha) data of NGC 7635, the Bubble Nebula. I captured the image using Maxim DL and CCD Commander, calibrated and stacked it in CCDStack, and processed it in PixInsight.

In PixInsight, I found an interesting way to pull the details out of the image. Here is the full processing sequence:

  1. Flipped the image with a vertical mirror transformation. Somehow, the bit order for 32-bit floating point in CCDStack does not agree with how PixInsight is reading it, so it needs to be flipped to start.
  2. Cropped the image to eliminate the border areas where alignment left behind some artifacts. This is important for stretching the image later as there can be extreme values in the border artifacts that can show up as clipped data later when they are really just noise.
  3. Created a Star Mask.
  4. Stretched the image with the histogram tool and slightly with the curves tool to just the edge of the noise floor. This is my base non-linear image.
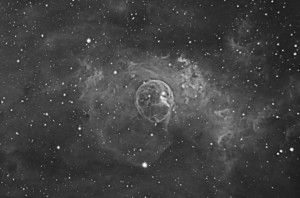
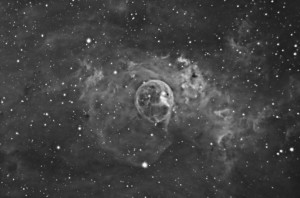
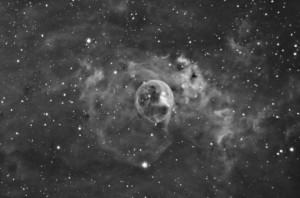
  5. With a clone of that image, performed a series of HDRWavelet transforms, with the number of layers from 2 to 6. For each number of layers, I saved the transformed image and returned to the original non-linear image. This gave me a gallery of images with different scaled features highlighted.
  6. I then created a PixelMath expression that averaged all of the images and allowed me to weight each image. The expression was as follows. I started out with the weighting factor even across the images. Mean(
    1.0*Base_Image,
    1.0*HDR_Image_Scale2,
    1.0*HDR_Image_Scale3,
    1.0*HDR_Image_Scale4,
    1.0*HDR_Image_Scale5,
    1.0*HDR_Image_Scale6
    )
  7. I then combined the image using a variety of weights. As it turned out, a pure average of the images gave what I feel is the best result, so the weighting factor did not come into play on this image.
  8. After that it was only a very slight stretch in curves and some delicate noise reduction using ACDNR to produce the final image.

Here is the final image. Clicking on the image will open the image the gallery.

NGC 7635—The Bubble Nebula

NGC 7635—The Bubble Nebula

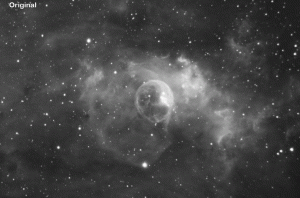
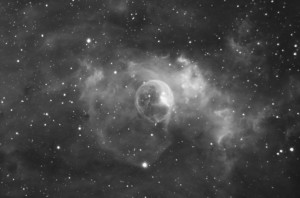
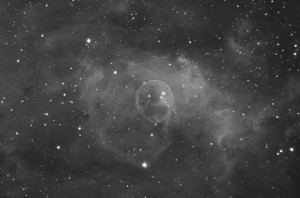
Here are the six images that went into creating the final. The first image will link to an animation showing each of the images in sequence. Clicking on any image will open a larger version.


Animation showing all the images in sequence (Warning—Over 2mb)

Animation


Original non-linear stretched image


HDR Wavelet with 2 Layers


HDR Wavelet with 3 Layers


HDR Wavelet with 4 Layers


HDR Wavelet with 5 Layers


HDR Wavelet with 6 Layers

Bones

Many years ago I came across a reading in Ezekiel that really struck me. The imagery was powerful and disturbing. I recently came across it again in a daily Mass reading in Magnificat. It is Ezekiel 37:1-14.

The hand of the LORD came upon me, and he led me out in the spirit of the LORD and set me in the center of the plain, which was now filled with bones.
He made me walk among them in every direction so that I saw how many they were on the surface of the plain. How dry they were!
He asked me: Son of man, can these bones come to life? “Lord GOD,” I answered, “you alone know that.”
Then he said to me: Prophesy over these bones, and say to them: Dry bones, hear the word of the LORD!
Thus says the Lord GOD to these bones: See! I will bring spirit into you, that you may come to life.
I will put sinews upon you, make flesh grow over you, cover you with skin, and put spirit in you so that you may come to life and know that I am the LORD.
I prophesied as I had been told, and even as I was prophesying I heard a noise; it was a rattling as the bones came together, bone joining bone.
I saw the sinews and the flesh come upon them, and the skin cover them, but there was no spirit in them.
Then he said to me: Prophesy to the spirit, prophesy, son of man, and say to the spirit: Thus says the Lord GOD: From the four winds come, O spirit, and breathe into these slain that they may come to life.
I prophesied as he told me, and the spirit came into them; they came alive and stood upright, a vast army.
Then he said to me: Son of man, these bones are the whole house of Israel. They have been saying, “Our bones are dried up, our hope is lost, and we are cut off.”
Therefore, prophesy and say to them: Thus says the Lord GOD: O my people, I will open your graves and have you rise from them, and bring you back to the land of Israel.
Then you shall know that I am the LORD, when I open your graves and have you rise from them, O my people!
I will put my spirit in you that you may live, and I will settle you upon your land; thus you shall know that I am the LORD. I have promised, and I will do it, says the LORD.

This time, I was more struck by the image of dry bones coming to life. A real feeling of resurrection and rebirth. This is certainly a powerful reading.

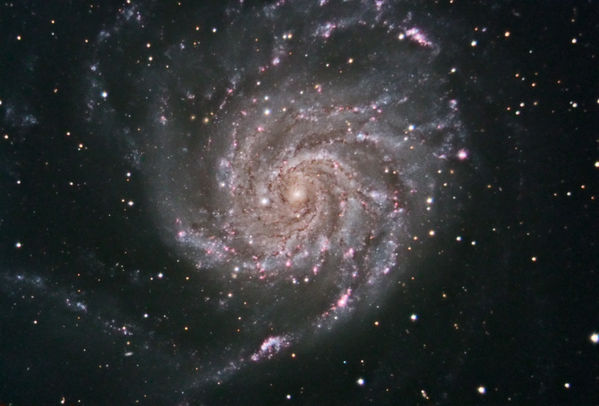
M101 — The Pinwheel Galaxy

A couple of weeks back, during the last quarter Moon, I was able to get some decent data of M101, the Pinwheel Galaxy. M101 is a spiral galaxy in Ursa Major and is 27 million light years away.

The image is from 160 minutes of LRGB data. That’s 90 minutes of luminance, and 23.3 minutes each of red, green and blue, binned 2×2. LRGB imaging takes advantage of the fact that we perceive most of the detail in an image from the black and white, or luminance part of the image and less detail from the color. I obtained 90 minutes of high-resolution black and white data and combined it with lower resolution color data to produce the image. The color was obtained by binning the pixels, or adding four pixels to create one. This allows for more data collected in a shorter period of time but at half the resolution.

Here is the result. Click on the picture to go to the gallery where you can see a full-sized version of the image.

M101

160 Minutes LRGB (90:20:20:20 subs 300:200:200:200×18:7:7:7)

Clear Skies and NGC 5033

It has been three months since clear skies, the new Moon, and being in Lake Riverside have converged on the same day and allowed for imaging. These factors came together on May 15th. I collimated the C-11 back at the full Moon and was ready to go. (Dew foiled my attempt to get even any Ha data that full Moon night but that is another story.)

I used my general approach for finding targets. I use The Sky’s database manager data wizard to query objects above 40 degrees or so. Moving from object to object I record my interest, the transit time, and the availability of a guide star. Up until this weekend I have tried to capture all of my data on one side of the meridian, preferably the east. This simplifies the taking of flats (with the ST-10 the camera rotates 180 degrees to maintain framing after a meridian flip) and the east has a better view from the western pier in the observatory.

I chose to image NGC 5033, a spiral galaxy in the constellation Canes Venatici. Is looks very interesting and has a very bright star that can be used for a guide star. Astronomical twilight would occur at about 9:15 PM PDT and the galaxy would transit at 10:32 PM. I hoped to get data both before and after transit, that being the best time to image as the object is highest in the sky.

I had my usual troubles with autoguiding and initial start-up but got imaging going by 9:40 or so. In the first of many little glitches, I had set CCDCommander to send me a text message when the first set of luminance images were done, but the message didn’t get sent because Zone Alarm had interrupted the request to send e-mail. Security software can be annoying. I was in the house watching Midway with the family, so I didn’t go back to get the next series started and lost 20 minutes of imaging time before the meridian crossing.

I planned on getting 50 minutes of luminance data and 20 minutes each of red, green, and blue. After having trouble on my last imaging outing with dark pixels on the color images, I wanted to make sure I had at least six sub-exposures and adequately dithered the frames—six frames to enable a sigma reject algorithm and dithering to move the dark pixels. So my luminance exposures were 300 seconds and my color were 200 seconds. I had other little issues with losing sync on the meridian flip and FocusMax acquire star not returning exactly to the original framing but overall things went fine the rest of the night. These problems would be solved if I were able to spend several days in a row in the observatory—a good goal for the future. I was able to use the new window shade to take flats after putting the white lights on the dimmer for the rope lights.

I ended up with 110 minutes of LRGB data, 50 minutes of luminance and 20 each of red, green, and blue. The RGB images were binned 2×2. I performed my data reduction, alignment, and combination in CCDStack. To simplify alignment, I process the luminance first, then save a binned copy of the final image. I then use that binned image as the master to align each of the sets of color images. This means that frames are only re-sampled once for alignment and that all combined frames are fully aligned.

Once I was processing the data it was clear that I really had inadequate imaging time for this object. At magnitude 10, it is quite dim. When the image was processed to bring detail to visibility, it was quite noisy and grainy. So I did the best that I could with it.

I did most of the processing in PixInsight. I have a standard approach when starting on an image that makes the later combine steps easier. The basic idea is to get a standard crop of the images that will work across all frames, eliminating any artifacts around the edges from the combine / integration process. The RGB frames are scaled up two times to match the luminance. Then, using the dynamic crop tool, I select a crop that will include solid data from all frames. I save an instance of the crop settings on the desktop and then save the process icons. This allows me to start and re-start work on each frame from a consistent point.

On the luminance, I used both the histogram tool and curves to bring out the details. A very nice feature of the histogram tool in PixInsight is the ability to see the number of pixels you have clipped so there is no guesswork. Generally I take several quick passes through the data before settling on a final processing approach. On this image, I took a copy of the luminance and applied a four-level HDR wavelet transform, recombining it with the original using PixelMath. This brought out the dust lanes in the center of the galaxy. I did need to create a star mask to preventing ringing when doing the HDR wavelet transform.

I tried to keep things simple on the color data. I used a channel combine to create an single RGB image, then used histogram to eyeball the black points across the colors. There is are some new tools in PixInsight that really helped the color. The first is Background Neutralization. In my experimentation with this tool, it will allow you to drop out the noisy background in a color image. I used the tool in truncate mode to eliminate most of the background data in the RGB frames. This is consistent with what RickJ suggested in the BAUT Astrophotography Forum. There is also a color calibration tool that appears to correct your color balance. I’ll have to work on understanding that.

My processing approach on images is to create solid luminance and RGB images. I then use channel extraction to pull the individual red, green, and blue components out of the RGB image. The final combine step is to use LRGB
Combination to create the final LRGB image. I touched up color and contrast and then moved to Photoshop.

In Photoshop, I used clone stamp and healing brush to fix a couple egregious color issues. I also used Noel Carboni’s Astronomy Tools actions to reduce noise in the image and tweak the star size. The final step was to add a layer processed with a high pass filter, masked to reveal only a few key locations, and merged with “soft light” blending mode to highlight some details.

Here is the final image. Still a bit noisy and needing more data, but I think it looks OK. Click on the image to go to the gallery and a full sized image. Comments and suggestions are always welcome.

NGC 5033 -- May 15, 2010