The Transit of Venus

Back on June 5th (in the Pacific time zone) was a singular event:  The Transit of Venus.  Venus passed directly between the Earth and the Sun, passing across the face of the Sun as seen from the Earth.  This happens rarely.  While the last transit was eight years ago, the next is 105 years from now.  Clearly unique in my lifetime.

The last Transit was not visible from Southern California.  This one was, starting at about 3pm and continuing until sunset.  I had prepped my C-8 on my old CGE mount (both worked flawlessly) with a Mylar solar filter.  I made a filter for my wife’s 200mm Nikon zoom.  We had Sun goggles.  I’d arranged my schedule to take the afternoon off, arriving just in time to open the observatory and point the scope.

The Transit started right on time.  There were a few sunspots on the face of the Sun, adding some visual interest.  One friend came by to see it.  It was a nice, low-key event, somewhat visually interesting.  What really made it fun was knowing that we won’t be seeing it again.

I took two images through the C-8.  The first was taken early in the transit, pointing my digital camera through the eyepiece. Some visual interest with the sunspots.

Venus Transit

Venus transiting the Sun, taken with eyepiece projection through a C-8 at about 3:30pm PDT 5-Jun-12.

The second was taken with my trusty ToUCamPro directly through the scope with a f6.3 focal reducer. Not all that pretty, but an accurate image.

Venus Transit

Venus transiting the Sun, taken at about 5pm PDT 5-Jun-12 with a ToUCamPro on a C-8 @ f6.3

Jerry Kamienski took a beautiful video of the Transit out at Lake Riverside.

Transit of Venus by Jerry K

CDK First Light Images

Finally posting here, two versions of the first real image taken with the new CDK 12.5 telescope. The full set-up: CDK 12.5 on an AP-1200 mount, ST-10XME camera, Pyxis 3″ rotator. Data captured with Maxim DL and CCDCommander, reduced and aligned in CCDStack, extensive processing in PixInsight with a final touch up in Photoshop. It is 3 hours, 25 Minutes LRGB with 100 minutes luminance and 35 minutes each of red, green and blue. All subexposures were 5 minutes and the color was binned 2×2.

This is the first version.

M81 V1

Here is the second version. A bit more aggressive on the processing on this one.

M81 V2

Click on the images to go to the gallery and vote on your favorite!

New Scope First Light Under Way

After many FITS and starts, I am finally capturing data with the my new telescope. I have had hardware problems software problems, and electronics problems. But finally I have data. I am currently imaging, so I hope I am not speaking to soon, I have all but the last few color frames of M 81.

Tonight did not start out too well. Having just replaced the entire wiring harness on the truck, it again has the “check engine” light on. I hope it is something minor. That did not set me in the best mood.

When I got things set up to start imaging, for some reason I was not getting any images from the camera. 20 minutes later I figured out that I had left the cap on the front of the camera, and didn’t see it because it is down inside of the mounting bracket.

The other thing that made tonight a little more difficult was that I am using a new computer. I resurrected my dead PC from a couple of years ago with a new motherboard so I would have a dedicated machine in the observatory. That meant that all the various pieces of software had to be configured to work. That took some time, but it is all working.

The Sky X works has been working more reliably on Win 7 64 bit than on XP Pro. Unfortunately my Lascar temperature logger does not work with Windows 7 64 bit so I still have the laptop in the observatory. Ultra VNC is working very well. I can fully monitor observatory operations from the house using my iPad.

I’ve been paranoid about dew all night, and the Telrad has dewed up a little bit. But the dew point is -3 C and the primary mirror is at zero, so I should not have any dew on the scope.

Just about another 40 minutes and I’ll be closing up and leaving the camera to take a bunch of darks. I sure do like the automation I do with CCD Commander, but that’s worth another post on its own.

8:30 AM Update. The dew point stayed below both the ambient and the primary mirror temperatures until I closed the roof. A that point the dew point shot up and I got dew and frost on the scope and on the primary mirror, possibly the secondary as well. It looked pretty bad last night but to day it looks ok. What it really means is that the dirt on the mirror will be hard to clean off.

The computer suffered a BSOD at a little after three am, so most of the darks I was trying to get were not captured. Hopefully this is not a recurring event.

Cable Organization

After many attempts, I think I have found a decent solution to cable routing and snagging problems. It has really been a problem for me, inevitably ruining images as a cable dragged by something and moved the scope as it slipped loose.

My setup has seven cables up on the OTA and five on the mount:

  • CCD Camera — Power, control, and guider
  • Rotator — Power and control
  • Focuser and OTA — Power and control
  • Mount — Power, two control cables, guider, and hand paddle

The first three on this list ride on top of the mount and move; the final one is fixed but must connect to the computer like the others. The camera cables need enough room to rotate 180° in each direction. Each manufacturer has their own power plug size and power block, none provide a long power cable.

This has always been a mess.

I approached the problem with three ideas:

  1. Run the cables off of the counterweight end of the mount (From Mike Rice of New Mexico Skies, shared at the 2011 Advanced Imaging Conference)
  2. Enclose the cables in wire loom (From fellow LRE Astronomer Jerry K)
  3. Pass only AC power and a USB Cable to the mount (My own thought but confirmed from others at AIC)

Ideas one and two are confirmed. Idea three is disproven. I tried putting everything on the mount. This included a power strip, four power blocks, and a USB hub. There was no good place to mount everything that was both neat and balanced. Back to the drawing board.

I built a shelf that sits below the top of the pier. This carries hubs, power bricks, and a USB-Serial adapter relatively close to the mount. Starting from the camera, I started a careful tube of wires (idea #2) that travel down to the counterweight end of the mount. The cables run down the counterweight side of the mount so that they only move back and forth at the point they come off of the mount (idea #1).

This is shown in the following photograph (click on the picture for a full-size image, and apologies for the blurry image).

Camera to Scope

Wire loom controlling cables from the camera to the mount

I have mounted the CCD Camera power supply on the counterweight shaft itself. SBIG really needs to provide longer cables on the DC end of their power supplies. At this point the power cables and control cables split and go to separate attachment points on the mount. This keeps the weight of the cables constant. This part of the set up is shown here.

Scope to Control

Cables go from the Scope to the Pier

There is no binding and no stress on the scope or the camera from movement of the mount. Nothing snags or tangles. Altogether a satisfactory solution.

Here is a wide shot of the full set-up.

Full Setup

OTA and Mount

Always Learning…

Since early December, I’ve been working on setting up a new telescope in the observatory. This has taken longer and been more involved than I expected. Rick W’s comment to me that they key to observing productivity is not changing your set-up is certainly true.

I’ve had two major hardware issues, with electronic parts being found defective after they successfully passed testing at the factory. With the help of Jerry K, I’ve been able to connect my ST-10 to the new scope. I’ve created what I hope is a better wiring set-up on the mount. And I’ve learned some things about software.

The defective parts were quickly replaced by the vendors. They also helped with the ST-10 connectivity. The software I figured out on my own. There are two software lessons.

Lesson 1. Removing ASCOM Components
ASCOM maintains its own registry of components. Some software does not remove the ASCOM registry entry during an uninstall. You can find orphan components by running ASCOM Diagnostics, part of ASCOM Platform 6.0. These orphaned components caused me problems with new components from the same company. To remove the orphaned components, use the ASCOM Profile Explorer. Find the component in the list and delete it. Simple, once you know what to do. Only a couple of hours and a mountain of frustration there.


Lesson 2. Locking the View to the sky in The SkyX Pro.

One of my biggest complaints in using the SkyX is that when I was centered on an object, it would move out of the field of view, as if I was looking through a alt-azimuth telescope. The only way I could stop it was to stop the clock. Not a good idea if you are attached to a telescope. I’ve finally learned why and how to get my preferred view to work. The clue is that the default orientation is terrestrial sphere which mimics how the sky would look from Earth. In fact, the stars do move by at the sidereal rate. What I want is what the SkyX calls the celestial sphere orientation. This keeps the stars in place on the screen. To select this view use Orientation > Celestial Sphere or alt-2. Now I am not grumpy with the SkyX.

As a final note, I’ve had a lot of support from PlaneWave and some alpha automated focusing software. I’ve also had no trouble with the latest release of FocusMax (3.6.0.71), downloaded from the files section of the FocusMax Yahoo! group.

Happy New Year!

AIC 2011 Day Two

Day two of AIC 2011 is about to start. Coverage was light yesterday, but I hope to make today better. Ken Crawford tells us that this is the largest AIC yet! And lower admission prices promised for next year.

First up, Hubble Award winner Ron Wodaski, author of The New CCD Astronomy, and truly one of the fathers of amateur astrophotography. Ron says we are all Astro-Quixote, in a constant search for more aperture, exposure, and data.

He’s building Tzec Maun observatory and putting a one meter scope in it. Lots of great details on the scope and camera, all going in a 50′ dome that was an old Air Force satellite reconnaissance station. Tzec Maun Foundation provides free access to high quality telescopes to students. Control system communications are HTTP and JASON, they have built a networked ASCOM compliant structure for controlling the scope and other systems. They are looking for research proposals and will offer paid access as well.

Next, Steve Cannistra on wide field image processing. Excellent definition: wide field is complete, has multiple related objects, and its impact depends on the whole frame. Wide field images area not high resolution and therefor less affected by seeing. He is using a Monet image as an example of how low resolution image can be quite beautiful image. Jay GaBany used impressionist paintings as examples yesterday. An impressionist theme is emerging at the conference.

Another theme: don’t bin RGB data. Cannistra feels that you lose good detail. Steve Leshin, Don Goldman, and Jay GaBany also said they do not bin their color. I think this reflects the ability to take more time imaging. Contrary to others, Jay does not feel that you need to get the chip that cold. He feels that -15C to -20C is enough. Jay GaBany and others said as cold as possible.

On resampling, don’t use bicubic. This reinforces last years lesson to use nearest neighbor for resampling. He suggests using GradientXTerminator on each channel separately to best eliminate gradients, using different aggressiveness and scale settings for each. Don’t use a fully processed Ha image to combine with RGB, because non-linear stretch will not match. Adding Ha to blue channel reduces good spatial information in the blue channel. So add OIII to blue and green. A key idea is to add narrowband as part of an RGB, not artificial palate, image. Noise reduction can eliminate faint detail, which is a loss to the image.

Astrophotography is a way to share what can be seen and a moment in time. It is a remembrance and celebration of a moment, just like other photography. Not science but art. Apologies if I haven’t captured Steve’s sentiments fully.

Nick Risinger is up, on a major mosaic project — a full night sky image. Captured with a unique six camera setup over an entire year, this is an absolutely stunning project. Used Maxim DL to reduce and IRAF to combine differing length exposures into one high dynamic range image. Images were standardized against full sky data from Pioneer. Just an amazingly brilliant approach. Open source for matching the mosaic and then PixInsight to create the final color image. Click the link above to check it out.

After lunch and we have Alex Filippenko to talk about some real scientific astronomy. All about black holes. Finding visual counterpart of gamma ray bursts is a good area for pro-am collaboration.

After that interesting presentation we have Peter Kalajian on Flat fielding. Flats fix dust and vignetting by dividing the raw light by a normalized value from the flat, with darks taken out in both cases. It is important to dark subtract your flats as that will change the normalized flat value (normalized is the flat value per pixel divided by the average value of the entire flat).

For good flats, evenly illuminate, just below non linear level of CCD, longer than 2 seconds to eliminate shutter effect, and use good darks. Go for million photon flats totaling across all frames.

Sky flats are for professionals, using the sky over a long period of time. We should say twilight flats for what amateurs typically use. Twilight flats have challenges, can be good, but are not repeatable. Light boxes need careful construction but give good flats. Electroluminescent panels can be good. Make sure to pick a full spectrum panel. Looking at the flat can help you diagnose the imaging train. Focus does not effect flats. Rotator position is not important IF your camera is directly on the axis. (Not for my set up!).

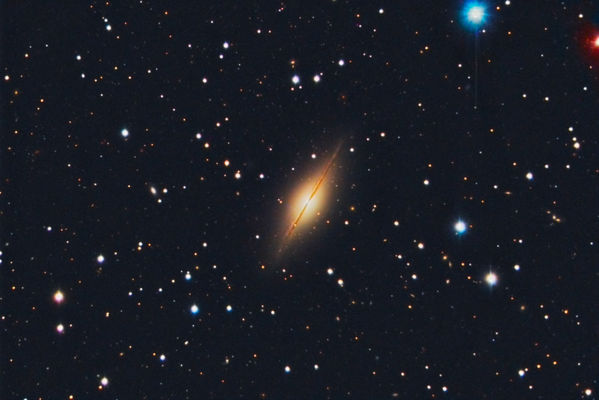
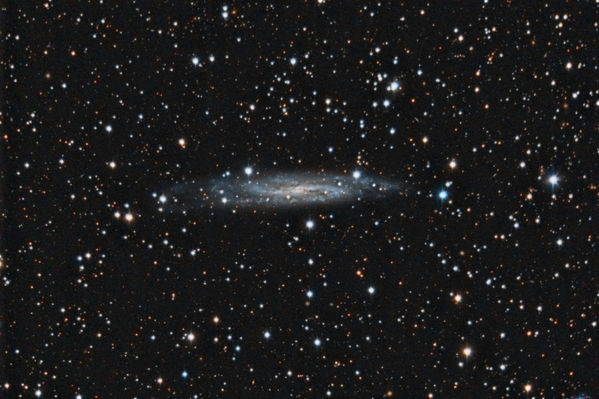
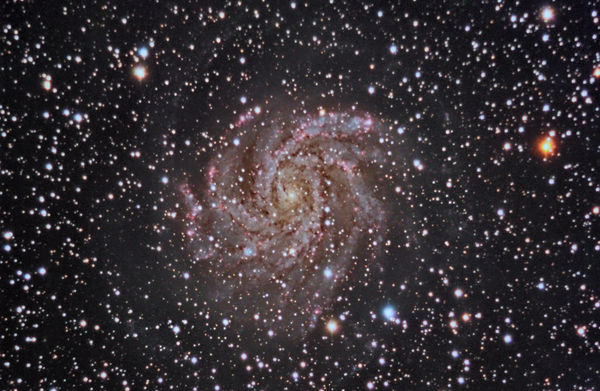
Now for the spotlight presentations. First up is Dr. David Maertinez-Delgado talking about stellar streams. Theory predicts streams around galaxies, but they are very faint. Astronomers are looking for evidence of the streams in both the Milky Way and other galaxies with the help of amateurs.

Dean Salman on creating a Sharpless catalog. An ambitious project. And some very nice images.

Joel Hagan, speaking about Mars surface imaging. He puts together images from the Mars missions. Makes the images perceptually easy to understand. Also some very cool work in creating 3D images.

And it’s a wrap for the day!

New Images, Better Technique (more later, too)

I finally used the resources that PixInsight provides, in particular a great new video on LRGB processing, and I made a big leap in producing good color images. It started with the first data I’ve collected in 2011, NGC 7640.

NGC 7640

This is a faint galaxy in Andromeda. It is a total of 2 hours, 10 minutes of data. I was very happy with how the color turned out. So I went back and used the techniques from the video (along with my additions) to reprocess some data from last year. Here are the results. First, NGC 2146, a disrupted galaxy in Camelopardalis, with a version much better than the original.

NGC 2146

The second better processing was the fourth version of NGC 6946. I think I’ve finally got the best result from the large amount of data (over 6 hours) I took on this object.

NGC 6946

I plan on posting a full story of the processing later, once I complete the work on two objects I images last weekend.

Lake Riverside Estates Astronomy Club!

Several weeks back, I received an e-mail inviting me to join a small astronomy club in Lake Riverside Estates. I was happy to accept and we have already had productive meetings. Without permission of the members, none will be mentioned here, but we are a group of five, all interested in astronomy in Lake Riverside.

We’ve had visits to two of our observatories and had some excellent solar observing. This last Saturday night we did a little imaging. With some clouds we more exercised the equipment than imaging. But it was a good time.

After the visit, I did get some good data on NGC 7640, a spiral galaxy in Andromeda. Here is a quick processing of the 80 minutes of luminance I gathered that night.

NGC 7640

NGC 7640, Spiral Galaxy in Andromeda

NGC 2146

A month or so ago I finally got around to processing some data I took last November. The target was NGC 2146, a spiral galaxy in Camelopardalis undergoing some serious disruption. My data capture was problematic. Due to CCDCommander’s retention of prior settings when creating a script (this is not a bad feature), I took most of my luminance data binned 2×2. Probably not a bad idea as seeing wasn’t that great, but not what I had intended. In trying to recover from this error, I did not get adequate color data.

I did all of my alignment and combination processing in PixInsight, and had a good learning experience there. The main one is to make sure to use the optimize function on the darks. All in all, even with the data challenges, the image turned out OK.

Here is the final result:

NGC 2146