Back in October, I took some data of the Bubble Nebula (NGC 7635) and open cluster October Salt and Pepper (NGC 7634). I took 180 minutes of data:
- 90 minutes Hydrogen Alpha (Ha) in 9, 10-minute sub-exposures unbinned
- 30 minutes Luminance in 6, 5-minute sub-exposures unbinned
- 60 minutes, 20 each of Red, Green, and Blue in 2, 10-minute sub-exposures binned 2×2.
I’ll start with the finish. Here is the final image. (Click on the image for a larger version in the gallery.)
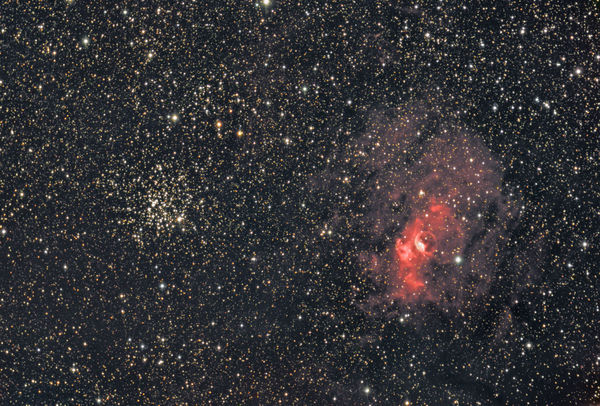
While I do think this is a nice image, it does have the pale salmon reds typical of Ha LRGB processing in basic combine method I used. My basic approach was to make an Ha-Luminance image which was then combined with the RGB to produce the final image. This started off all right as the HaL image looks fairly good. I created the image by adding 3 times the Ha to the Luminance using Pixel Math (most processing was done in PixInsight). I used both HDR Wavelets and A Trous Wavelets to sharpen up the image. Here is the HaL image used to create the final.
")
I then created an RGB image, adding 3 times the Ha to the red before combining with blue and green. I processed the image, stretching with histogram and curves to end up with a final RGB image. I brought both the Ha-Luminance and the RGB into Photoshop, pasting the Ha-Luminance on top of the RGB and changing the blending mode of the pasted layer to luminance. There was a lot of noise in the color image, with hot pixel color spots from each different color. Selecting the bottom, color layer, I used the spot healing brush tool to clean up the bad spots. This worked very effectively underneath the luminance layer, since only the spurious color was removed, not the details in the image. I now regret that I didn’t save a separate layer version of the image at this stage. Given the results, I figured I would go back to the beginning (and I still may).
I spent a fair amount of time tweaking the color balance, and passed the image through PixInsight’s GREYCstoration noise reduction algorithm.
Since the original processing, I have tried PixInsight’s “A New Approach to Combination of Broadband and Narrowband Data,” but my color data binned 2×2 is too noisy for it to work. I may yet try Rob Gendler’s approach. At this point, I think I am tired of working on this image.
One lesson learned from this is that when one is doing narrowband imaging, it is better to get full resolution color. This provides better data to use when creating the final image, and allows the luminance combine that creates the peachy / salmon red tones. I got better results on the Heart Nebula, but I’m not done processing that one so it will be another post.
I did try a highly stretched Ha-Luminance image to see what detail I could get out of the image. This is stretched very hard and it has brought out the noise, but there is a lot of detail in the image. This is created from the maximum of 5 * Ha or the Luminance image in Pixel Math, then stretched with curves and some blackpoint adjustment in the histogram tool. I did average in an HDR Wavelet and A Trous Wavelet to enhance the detail in the nebula. Click for a bigger image as the thumbnail is pretty small.
")
You must be logged in to post a comment.