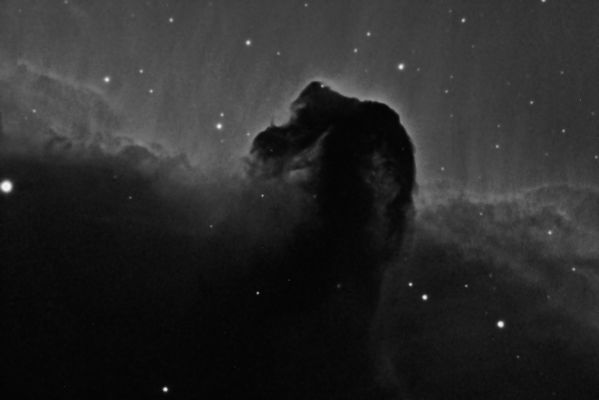
This past weekend was the new Moon and my first opportunity to try out my new Optec 0.5 focal reducer that I picked up at the AIC. It turned out to be a lesson in why one should always use a full Moon weekend when trying a new setup.
I got the C-11 on the AP-900 without trouble. No trouble mounting the focuser, reducer, field rotator, and camera. I was a bit surprised to see that I needed all my counterweights, but everything balanced. The trouble came when I took the first images to get to rough focus and then find a star and sync the scope. I could not get the scope to focus. It turns out that with the CFW-8 (instead of Optec’s focuser) I needed another half inch to get to focus. (I’ve spoken with Optec and they will be swapping the FLR for their new 0.63 reducer — they take care of their customers.)
After some consideration, I decided that the best way to proceed was to just remove the FLR and try imaging at f10. This is very challenging with the C-11. The C-11 has 2800mm of focal length, and with an ST-10 that is 0.5 arcsec / pixel unbinned. Better than any seeing I might have and very difficult to guide. I tried several objects and could not accurately guide. I finally gave up and spent time using PEMPro to improve my polar alignment. After that correction I was able to decently guide, and I took 30 minutes of Ha data of the Horeshead Nebula, IC 434 (more on that below). At any rate, I would consider the night mostly a bust.
Now, in contrast, my friend Justin came up and set up his entire set-up of his FS128, ST-10 and piggy back guiding in the observatory. With one minor tweak to get the scope to focus, he spent the entire night imaging, and got quite a bit of good data.
Back to my Horsehead. I took six, five minute exposures, binned 2×2 through the 6nm Ha filter. This is very little time for an Ha image, even binned 2×2. The end result was somewhat noisy, but had some interesting details given the high magnification. Just for fun, here is my processing sequence, as best as I can remember it.
- In CCDStack, calibrated, aligned, sigma-rejected, and mean combined the frames, saving as 32 bit floating point (by trial and error, I have found this the best format for transferring to PixInsight)
- In PixInsight: Stretched the image to visibility with histogram (no clipping) and curves
- Created a star mask. This was a but tricky and required tweaking the input histogram and output clipping of the image to get a decent star mask. This is required for HDR Wavelets
- On a duplicate of the base image, performed an HDR Wavelet transformation with 5 (the default is 6) layers with the image masked with the star mask.
- Combined the base and the HDR image with pixel math to create a new image. Rescaled by 100% (doubled) the image and performed an A Trous wavelets transform, emphasizing the 5th layer with a slight bias increase (0.3), with the star mask applied. Rescaled back down to the original size.
- Created a final image of the sum of the original, the HDR and the HDR/A Trous wavelet image.
- Applied curves to brighten the image and then a bit of Greycstoration noise reduction. Saved as a 16 bit TIFF file. I also saved a version without noise reduction.
- In Photoshop, did a high pass filter on the non-noise reduction version to crispen up the nebular areas. Pasted this on top of the noise reduced version, masked the layer and revealed it only in key areas, blending with the soft light method.
- Finally, some touch up on dark pixels.
So many steps for some so-so data. I think I got all that I could out of it. The striations in the nebula above the horsehead are visible, and there are nice details in the head itself. You can see some faint details below the head as well. Here is the end result (click on the image to go to see a full sized image).


Pingback: Horsehead Up Close in Ha - Bad Astronomy and Universe Today Forum
Pingback: Elisha’s Gold