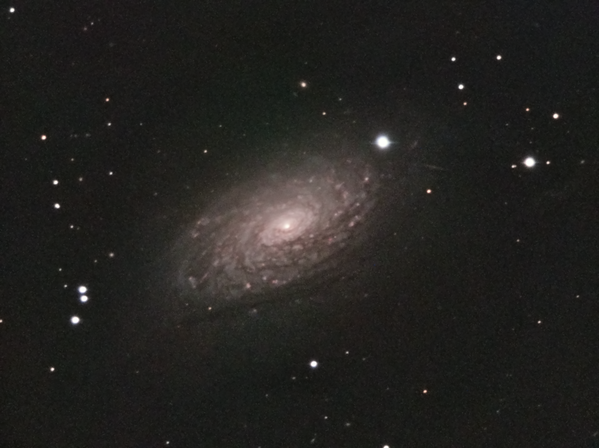
Back on May 12th, the Mar Vista Clear Sky Clock was predicting a nice evening, so I set out to do a night of imaging. After a bit of searching using The Sky and CCD Navigator, I settled on M63, the Sunflower Galaxy in Canes Venatici.
One of the major struggles was finding an object with an adequate guide star. The brighter the guide star, the more frequent the guiding using the AO-7, and the sharper the image. The brightest star in a usable location for M63 is magnitude 9.83 — really quite dim. It required 1 second guide exposures, longer than I have done with the AO-7 and the C-11.
The day was quite hazy, poor transparency in astro-speak. But poor transparency often is accompanied by good seeing so I went ahead anyway. I got the camera set-up, the scope aligned, focused, found the guide star, etc. and started imaging around 9:40pm.
I took 5-minute clear filter shots and 3 minute R/G/B shots binned 2×2. The poor transparency made the effects of the severe local light pollution worse. The shorter RGB shots reduce the impact of sky glow on the image.
The clear filter does not block the near infrared light (NIR) that a luminance filter would block. I have been using the clear filter based on comments I read to the effect that one can get good data in the NIR so I have been imaging with a clear rather than a luminance filter. That being said, in this case it is a moot point because I am also using a Hutech light pollution filter which blocks the NIR. In the process of writing this post, I found an article by Don Goldman concluding that, for galaxy imaging, one should use an L filter. But I digress.
The imaging went fairly easily. The temperature was stable, staying at about 50 degrees. If the temperature falls too fast, one needs to refocus frequently. I use Astrodon parfocal filters so I do not need to refocus between each filter. The galaxy transited at 10:51pm. I stopped imaging and took a set of flats. When I was rotating the camera to get the guide star back, I felt the clutches slip a little bit, so I needed to shut things down and restart the scope with a “last alignment.” The pointing was OK, but I forgot to turn PEC back on, so the guiding for the two clear images taken after the meridian flip was not that good. That was the one GRRRR moment during the image. I finished up late, after 2am, took the final set of flats and went to sleep.
It took a while to get around to processing the data. I left the following Monday for a week in Dublin for a business meeting, so there was no time to work with the data until I got back. Here are my processing steps:
- Apply darks, flats, and biases to all frames (there were 51, 18 clear, 11 each RGB, but I had to throw out one blue image because of a satellite pass) in Maxim DL
- Remove blooms from the images using Ron Wodaski’s bloom remover plug-in in Maxim DL. I tried to use the bloom remove in CCDStack, but it does not work for me.
- Aligned, sigma-rejected, and combined (summed) each set of clear and RGB images and then the final LRBG images using CCDStack.
- In PixInsight, I stretched the image to bring out the galaxy (a raw FITS file fresh from the camera need contrast stretching to make the object, stars, etc, visible). I used dynamic background extraction to extract the gradient from light pollution in each image and then used pixel match to subtract it from the base image. Note: If you are not careful and use the default 2x downsample in background extraction, you can end up with half sized final images. I tried the automatic background extraction, but the dynamic process worked much better.
- I then color combined the object in PixInsight. This involves creating a blank RGB image of the appropriate resolution, and using the LRGB combine process to create the combined image.
- Using the PixInsight histogram stretch, I balanced the colors in the image. This tool is very powerful in PixInsight. You can manipulate the histogram with great detail and with very detailed feedback as to what your changes are. It even tells you how many pixels you have clipped, so you can manage that finely as well.
- With the new HDRWaveletTransform process in PixInsight, I brought out the details of the galaxy, and then adjusted contrast with a curves adjustment. To do an effective transform, you need to mask the stars so they don’t get bloated. I created two masks: a star mask and a galaxy mast. I subtracted the galaxy mask from the star mask (the original included some details from the galaxy) and ended up with a decent mask.
- From here it was into Photoshop, where I applied a minor high-pass filter (8 pixels, blending mode Soft Light, opacity 41%), and adjusted saturation (+13) and color balance.
- Back to PixInsight for noise reduction. The newer GREYCstoration did not do a good job on the noise in the image. The ACDNR process, however, allowed me to focus the noise reduction on the color part of the image and did a very nice job without losing any details in the image.
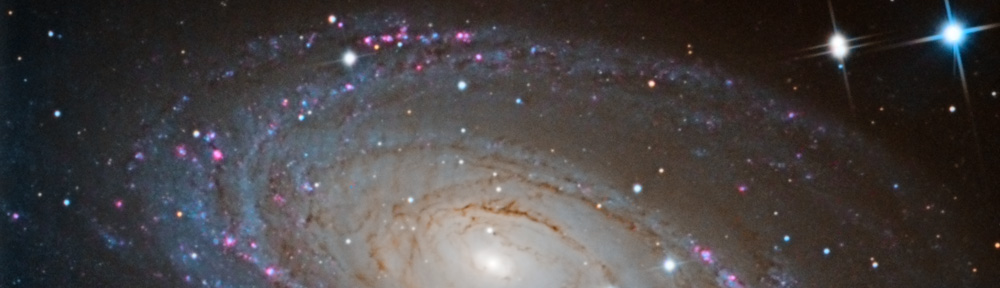
Here is the final image: