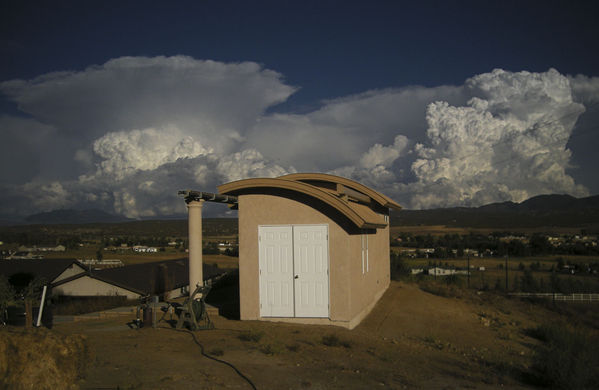
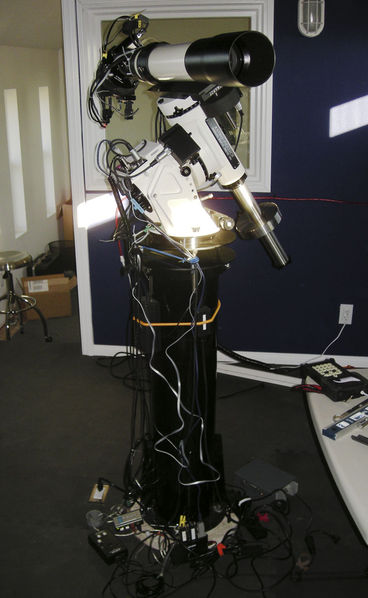
Archive for the 'Observatory' Category

h1

First Light and a Quick Update

Wednesday, November 4th, 2009

I just noted that it has been over two months since my last post. I have been meaning to post on first light, automation software, and a wonderful night of viewing and imaging. But I haven’t found the time.

Here is the first light image, NGC 7331 and the Stephan’s Quintet. Clicking on the images will bring you to the gallery.

Deer Lick Group and Stephan's Quintet

I took more data of M33. This image has data from 2008 and 2009, all from Lake Riverside.

M33 -- The Triangulum Galaxy

Finally, here is a pretty shot of the observatory with some major convection in the background. We did not, thankfully, end up under those storms.

Convection

h1

Roof Opener Installed

Monday, August 31st, 2009

After much waiting, the opener mechanism has been installed on the roof. At the press of a button, I can open the roof. The opener is an industrial vertical door opener. The roof is quite heavy, I would estimate at least 2,000 lbs, so getting the roof moving takes quite a bit of torque. I know from moving the roof manually, that once it is moving, it moves fairly smoothly, but starting it takes quite a shove. With the motor, it moves quite smoothly, fully opening in about a minute. The motor does have a chain-operated backup in case power is out or the motor is not operational.

Here is a wide shot of the whole set-up. The opener is attached to the observatory wall, and the track was welded onto the opener beam. There are some finish details to be completed. The track will be enclosed in a shroud of roof metal and the motor cover will be painted to match the walls.

Opener and Track

This shot shows the detail of the motor and attachment to the roof. The chain set-up is bolted to the roof, attaching into the steel studs under the roofing material.

Opener

Unfortunately, we had thick high clouds all weekend, so there was no astronomy. But opening the roof was pretty cool!

h1

First Light

Monday, August 17th, 2009

After much planning, regulatory hurdles, over seven months of construction, and one item still pending, the new observatory has seen first light. Last Wednesday I put the mount and NP-101 into the observatory and viewed the sky. I aligned the scope with no issue. My rough alignment of the pier adapter was almost spot on.

The viewing was good, but not excellent that night as the transparency was not very good. M27 was the first object I viewed. The shape was quite clear in the eyepiece. The Lagoon Nebula and the Trifid Nebula together in the 41mm Panoptic eyepiece were absolutely amazing. The Omega Nebula around M17 was great. Faint and small objects like the Cocoon Nebula or the Veil Nebula were not visible. It was great not to be bothered by the incoming light from the few security lights in the valley or the lights of passing cars.

I set up the imaging equipment on Thursday, but smoke from fires in Santa Barbara county (200+ miles away!) made serious imaging impossible. I did get the equipment working and that was a good expenditure of time. I started working with ACP observatory automation software on Friday. It took several hours to get through the set-up, and I ran into some issues in the wee hours of the morning, but again, very good progress in getting the observatory fully operational. It got quite cool on Thursday night, into the upper 40s by the time I went to bed, so being able to work in the warm room was a major advantage.

We had guests on Saturday, and Art and Tod wanted to see the observatory in action, and agreed that we could image and argue with the software rather than view. We still had some issues with the observatory control software, but solved some of them and the others are likely some configuration I have wrong at this point. We successfully captured 30 minutes of data of the Deer Lick Group and Stephan’s Quintet galaxy clusters in Pegasus. Color imaging would have kept us up too late so we settled for a nice black and white image. Click on the image to go to the gallery where you can see a larger version.

Pegasus Galaxy Groups

This first light milestone comes after almost all the work has been completed. The desk is in the warm room and we are just waiting on the automation for the roof. Here is a view looking into the observatory from the warm room with the new desk in the foreground.

Warm Room Desk

This shows the scope and mount with imaging equipment attached. The mount can carry a lot more weight than I have on it now. In fact, because the scope is small, the camera runs into the mount as the scope points close to the zenith. I may piggyback the NP-101 seen here on my C-11. That would put things at the upper end of the weight range but would also move the imaging train up and away from hitting the mount when it points to the zenith.

Scope and Mount

Great progress has been made and I am looking forward to getting things automated. The roof is quite heavy and can be manually moved, but motorization will be a good thing. And while I don’t plan to image remotely, automation will allow me to get a full night’s worth of data and a full night’s worth of sleep.

h1

Almost There…

Tuesday, July 21st, 2009

It has been a while since I posted an update. We are getting the final touches in place. The exterior is complete, the floor is down in the observatory, the rope lights are up, and the warm room has a workable floor covering. Under way: Roof automation and a desk for the warm room. And now for some pictures.

This view looks to the south. The area around the pump is now orderly and neat, a major improvement. Believe it or not, the old trapped-air water tanks were on top of six inches of dirt on top of the slab on the ground. Go figure!

View to South

This view to the east shows a bit of the house down the hill on the left.


View to East

The pier and mount adapter have been aligned to north. The foam mat flooring went down quite easily. At the bottom is close-by power access and the 2″ conduit that runs to the warm room.


Pier Close-up

I have been holding off putting the mount into the observatory because there are two construction tasks left. And this weekend was no good as high clouds came in both nights, with a strong east wind coming up on Saturday night about 4am. But I expect the warm room desk and the opening motor will be complete by the time we return from my parents’ place in Upper Michigan. I am planning some time off in August to get the scope in, aligned, and finally get to first light.

h1

Another Step — Pier in Place

Monday, June 29th, 2009

Interior fitting of the observatory has finally begun. I’ve got the pier in place with the mount adapter attached. I’ve also cut the rope lights for the walls, and I will be mounting them about waist high. Here is a picture looking toward the warm room.

Pier

The Astro-Physics mount adapter fit perfectly onto the Sky Shed pier top. I had a little trouble setting up the rope lights, but it turned out it was just user error. The rope lights and the side lights are both on dimmers, and the rope lights work fine on the dimmer switch. There are a couple of things we need to do to get the weather stripping correct and the floor needs a good vacuum before I put the flooring in (I am using interlocking foam mats). You can see the power socket and the 2″ conduit that leads to the warm room at the base of the pier.

Temperatures inside were nicely below ambient until things started cooling off outside, so I am hopeful it will adapt quickly with the roof open. We had lows in the 40s and highs in the 90s.

I’d have moved the mount in but I discovered several holes in the drip line for the trees, and one underground in the yard. This bit of mischief added just enough maintenance so that I didn’t have time to move the mount and scope in, and I do want the final touches on the roof in place.

I am looking forward to the long weekend and several days dedicated time to get things set up.

h1

The Weather Brush

Monday, June 22nd, 2009

This past week, June 16 to be precise, we had our final inspection from the county. We have a signed job card and the building is official in the eyes of Riverside County. The main change from the last construction report is the addition of weather stripping, or a “weather brush” as I like to call it. It is a dense nylon brush, made for door weather sealing, that we adapted for use around the roof.

This picture shows the brush along the long side of the moving roof. Bolted into the fascia material, it forms a tight seal against the stucco. Click on the image to go to the gallery.

North Side

This view is of the west wall of the observatory. The roof moves off to the west, so this brush will press up against the wall when the roof is closed.

West Wall

The eastern end was a bit trickier. There is very little overhang and the brush needs to move over the wall when the roof opens and closes. This was screwed into place using the fascia material screws.

East Wall

There are a few minor touch up items before I begin to move the pier, mount and scope inside. I did select interior lights using an exterior light fixture recommended by the good folks in the discussion group at Cloudy Nights forums.

h1

Construction — Almost Done

Sunday, June 14th, 2009

In the last two weeks we’ve almost completed primary construction on the new observatory. The interior finish is complete, electrical is installed, and the well equipment installation is almost complete. Final inspection is planned for this coming Tuesday.

Here is the front view, looking to the south. All the finish is complete except for the equipment room doors, which are off pending completion of the well work. Not too different from a couple of weeks ago, but the locks are on the door and the exterior lights are mounted. Note the dark sky friendly downward facing exterior lights. Click on any picture to go the gallery with larger versions available.

View to South

On the inside, the finish is complete. I’ll be adding foam flooring once the final paint touch up is complete and we are past inspection. I have a spool of red rope lights to add which will be controlled by a dimmer. My current open question is what to do for interior, white, not-for-observing lighting. There are boxes for fixtures on each wall, but I am not sure what type of fixture to put up. I’d like to be able to work inside and possibly illuminate a white hanging on the wall for flats, but don’t want anything that would shine in the eyes while working.

This view looks from the observatory to the warm room. I think the white trim will help moving around in the dark and reduce the chance of falling down the two steps into the warm room.

Observatory to Warm Room

I thought it would be interesting to show a before and after shot. I don’t have a full panorama from before construction that includes the well equipment, but here is one from the first day of construction.

Before Construction

Here is a shot taken on June 13, with similar framing. The old well equipment is gone. The two tall tanks in the equipment room are the new trapped air pressure tanks. The doors will go on the equipment room once the new booster pump is working.

Construction Complete (mostly)

I am looking forward to getting the floor installed, the pier in place, and the scope working!

h1

Interior Finish Started

Saturday, May 30th, 2009

Here is a quick update on construction progress. As of last weekend the drywall was complete and paint almost complete. I note that my prior outside shot of the observatory was lightened too much. So here is a shot, looking to the south, that has better color balance.

View to South

But the real progress is all inside now. This view looks from the observatory into the warm room. It is a mosaic, and there are artifacts from the merging process. I was considering painting the wall to the warm room white to provide some additional ambient light while observing, but ultimately decided that it would provide too much light.

Looking to the Warm Room

This view looks to the southeast corner of the observatory. The wall finish is complete, and the molding at the bottom of the wall is partially installed. The molding is white, to provide a contrast around the edge of the floor and some feeling about where the wall is when you are in the dark. On the right next to the window is an opening for an exhaust fan. With the curved roof and the need to fit over the wall, we were unable to find a roof-based fan that would work.

Partially Finished Corner

With the excitement of an angioplasty for me and eighth grade graduation for my daughter, we won’t be able to get out to see progress for a couple of weeks. By the time we do get out, the electrical will be complete, the well work done, and we should be ready to install the first telescope. I can’t wait.

h1

Stucco Complete

Wednesday, May 20th, 2009

The exterior of the observatory is almost complete. The stucco color finish was completed last week. The major addition was the column finish around the steel support beam for the roll off. It is a nice finishing touch. The stucco color looks different from the color chip, but it looks OK with the roof. Here is the observatory last weekend looking to the south.

View to South

h1

Roof Complete

Saturday, May 9th, 2009

We’ve reached another milestone in construction. The roof is complete and the base coat of the stucco is on the building. Pictures tell the story.

This shot shows the observatory from a distance looking east. The metal seamed roof looks very nice. As light a color as could be acceptable under home owners’ association rules. The “Ultra-Cool” roof is supposed to reflect heat. I hope it does. Clicking on the picture will bring you to the gallery.

Wide to East

This view looks to the south. The color of the beam matches the roof; the doors will match as well. the missing door on the right side of the image is due to an accident in high wind that damaged the door. It slammed back and bent in the middle. It will be great to see the stucco color coat next week.

View to South

Finally, this shot shows the detail of the roof, soffit, and stucco. It is all fitting together very well. We still have all the weather stripping to do, and that’s going to be a challenge. But it’s really looking good so far.


Roof Line Detail

We are getting really close now. I’ve got to start thinking about the desk setup in the warm room, the red rope lights, and network connectivity. Now the work begins!