Almost There…

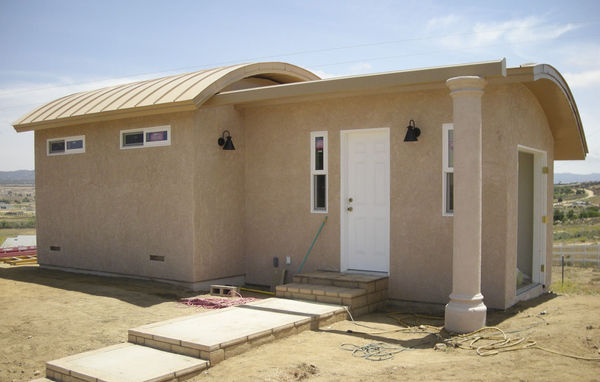
It has been a while since I posted an update. We are getting the final touches in place. The exterior is complete, the floor is down in the observatory, the rope lights are up, and the warm room has a workable floor covering. Under way: Roof automation and a desk for the warm room. And now for some pictures.

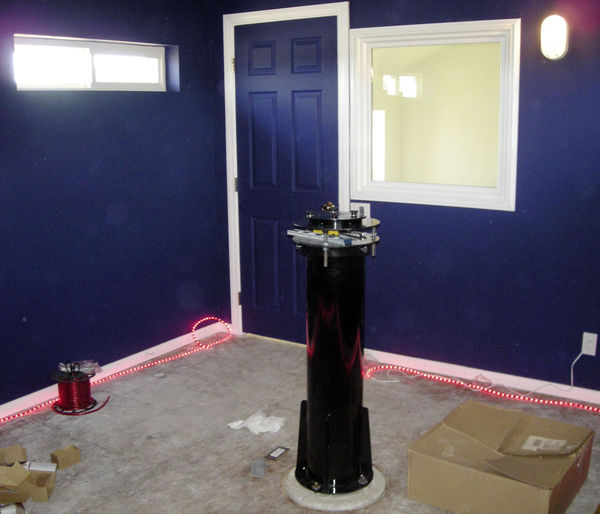
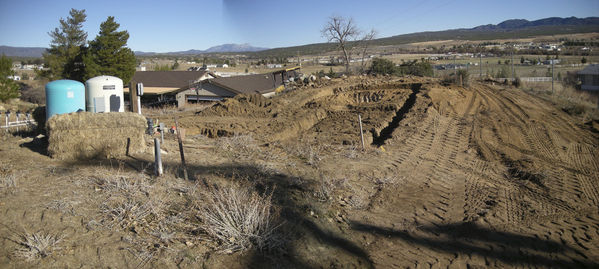
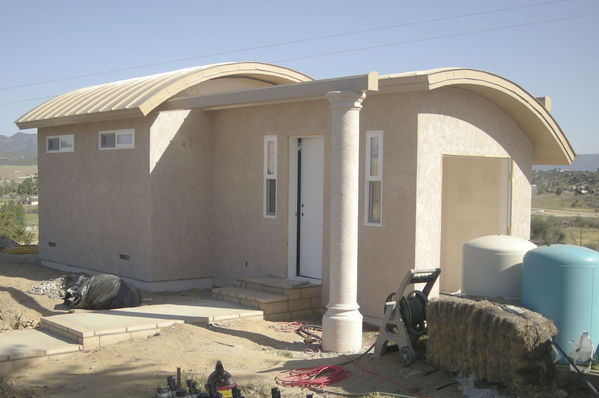
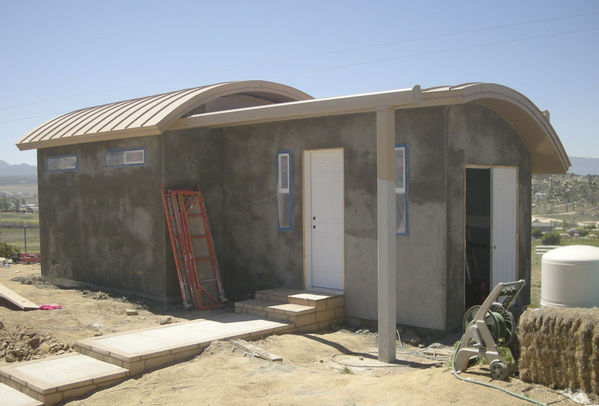
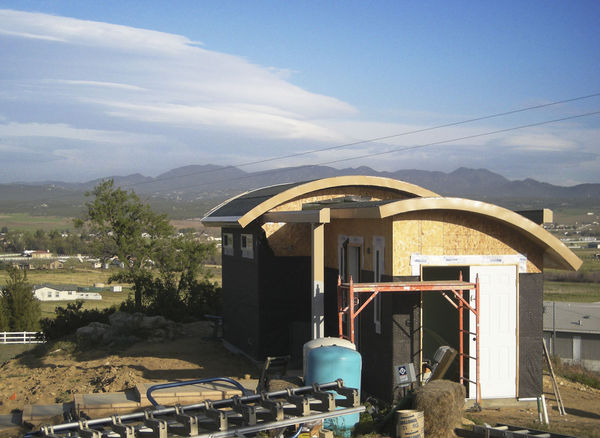
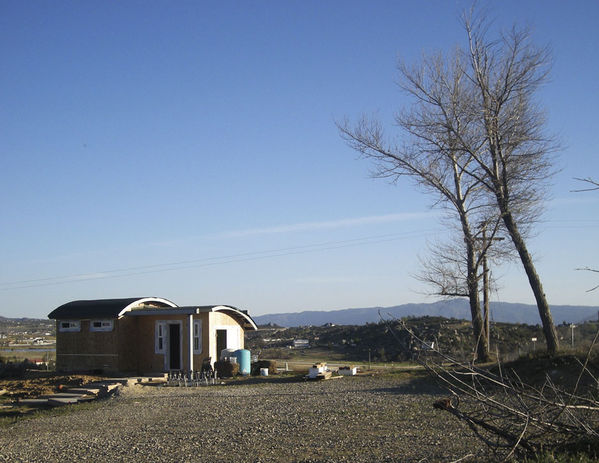
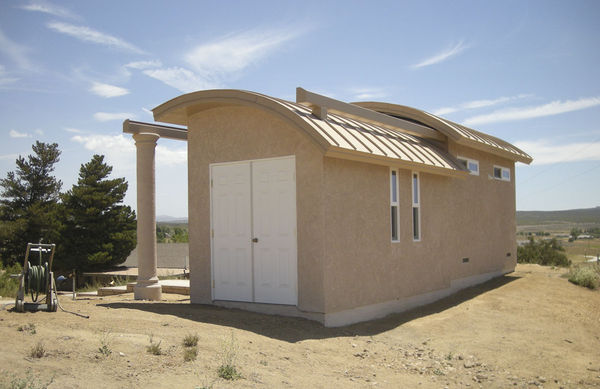
This view looks to the south. The area around the pump is now orderly and neat, a major improvement. Believe it or not, the old trapped-air water tanks were on top of six inches of dirt on top of the slab on the ground. Go figure!

View to South

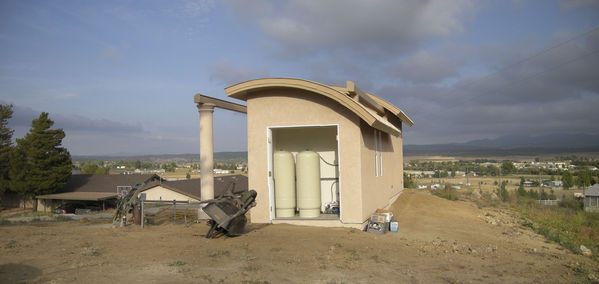
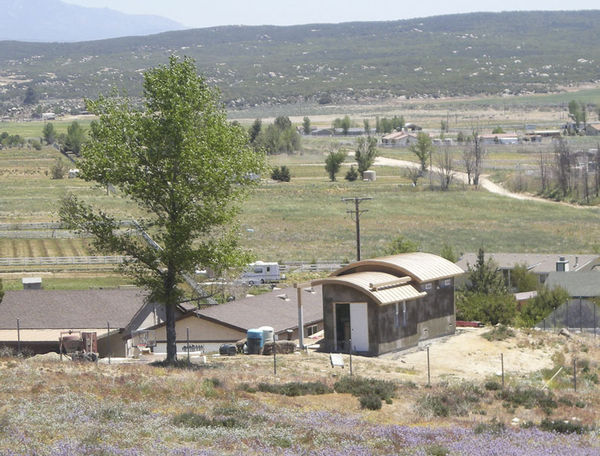
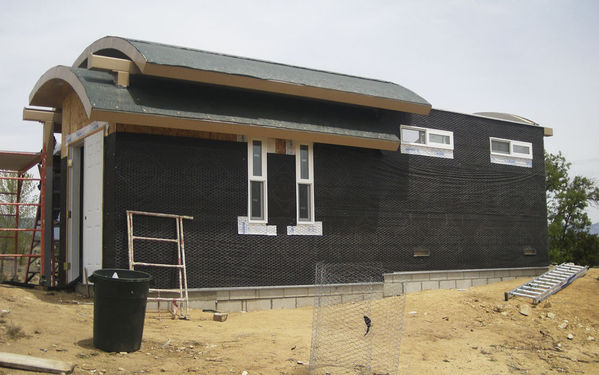
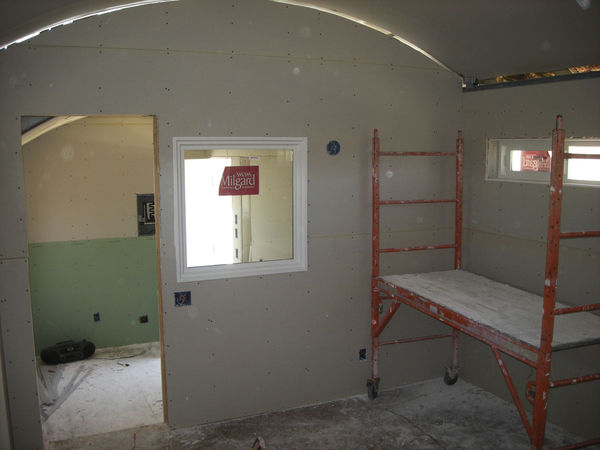
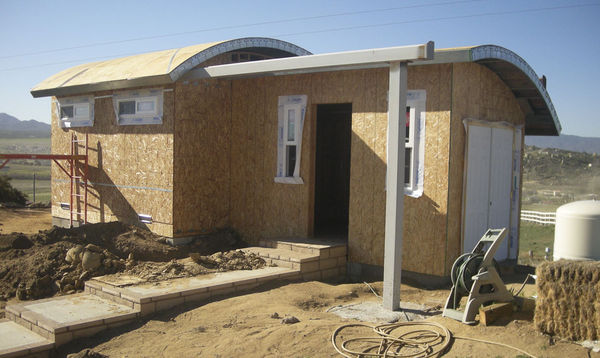
This view to the east shows a bit of the house down the hill on the left.


View to East

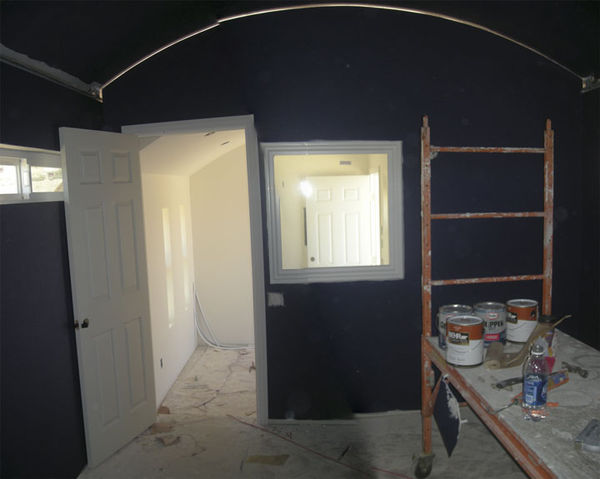
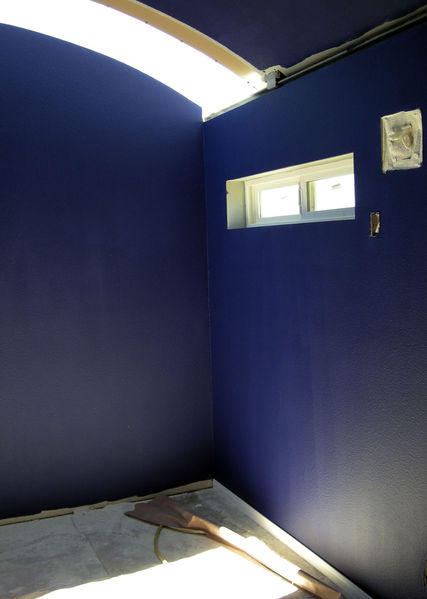
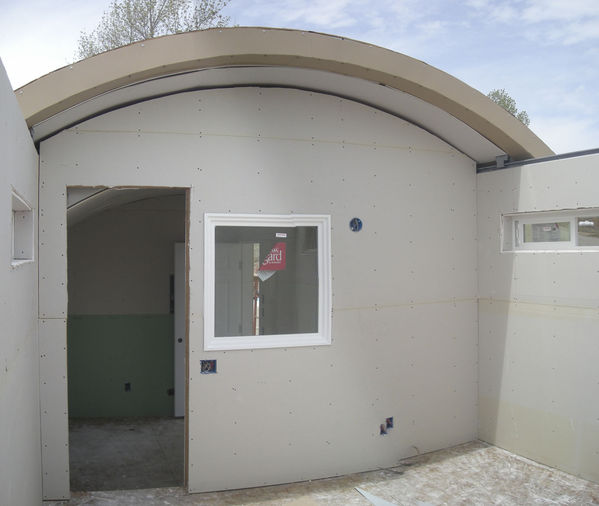
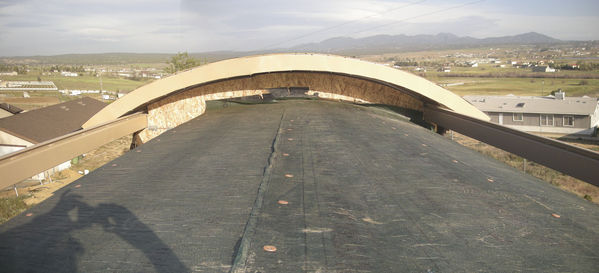
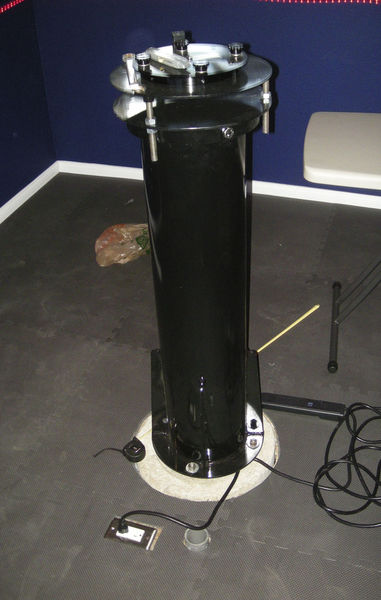
The pier and mount adapter have been aligned to north. The foam mat flooring went down quite easily. At the bottom is close-by power access and the 2″ conduit that runs to the warm room.


Pier Close-up

I have been holding off putting the mount into the observatory because there are two construction tasks left. And this weekend was no good as high clouds came in both nights, with a strong east wind coming up on Saturday night about 4am. But I expect the warm room desk and the opening motor will be complete by the time we return from my parents’ place in Upper Michigan. I am planning some time off in August to get the scope in, aligned, and finally get to first light.

Another Step — Pier in Place

Interior fitting of the observatory has finally begun. I’ve got the pier in place with the mount adapter attached. I’ve also cut the rope lights for the walls, and I will be mounting them about waist high. Here is a picture looking toward the warm room.

Pier

The Astro-Physics mount adapter fit perfectly onto the Sky Shed pier top. I had a little trouble setting up the rope lights, but it turned out it was just user error. The rope lights and the side lights are both on dimmers, and the rope lights work fine on the dimmer switch. There are a couple of things we need to do to get the weather stripping correct and the floor needs a good vacuum before I put the flooring in (I am using interlocking foam mats). You can see the power socket and the 2″ conduit that leads to the warm room at the base of the pier.

Temperatures inside were nicely below ambient until things started cooling off outside, so I am hopeful it will adapt quickly with the roof open. We had lows in the 40s and highs in the 90s.

I’d have moved the mount in but I discovered several holes in the drip line for the trees, and one underground in the yard. This bit of mischief added just enough maintenance so that I didn’t have time to move the mount and scope in, and I do want the final touches on the roof in place.

I am looking forward to the long weekend and several days dedicated time to get things set up.

The Weather Brush

This past week, June 16 to be precise, we had our final inspection from the county. We have a signed job card and the building is official in the eyes of Riverside County. The main change from the last construction report is the addition of weather stripping, or a “weather brush” as I like to call it. It is a dense nylon brush, made for door weather sealing, that we adapted for use around the roof.

This picture shows the brush along the long side of the moving roof. Bolted into the fascia material, it forms a tight seal against the stucco. Click on the image to go to the gallery.

North Side

This view is of the west wall of the observatory. The roof moves off to the west, so this brush will press up against the wall when the roof is closed.

West Wall

The eastern end was a bit trickier. There is very little overhang and the brush needs to move over the wall when the roof opens and closes. This was screwed into place using the fascia material screws.

East Wall

There are a few minor touch up items before I begin to move the pier, mount and scope inside. I did select interior lights using an exterior light fixture recommended by the good folks in the discussion group at Cloudy Nights forums.

Construction — Almost Done

In the last two weeks we’ve almost completed primary construction on the new observatory. The interior finish is complete, electrical is installed, and the well equipment installation is almost complete. Final inspection is planned for this coming Tuesday.

Here is the front view, looking to the south. All the finish is complete except for the equipment room doors, which are off pending completion of the well work. Not too different from a couple of weeks ago, but the locks are on the door and the exterior lights are mounted. Note the dark sky friendly downward facing exterior lights. Click on any picture to go the gallery with larger versions available.

View to South

On the inside, the finish is complete. I’ll be adding foam flooring once the final paint touch up is complete and we are past inspection. I have a spool of red rope lights to add which will be controlled by a dimmer. My current open question is what to do for interior, white, not-for-observing lighting. There are boxes for fixtures on each wall, but I am not sure what type of fixture to put up. I’d like to be able to work inside and possibly illuminate a white hanging on the wall for flats, but don’t want anything that would shine in the eyes while working.

This view looks from the observatory to the warm room. I think the white trim will help moving around in the dark and reduce the chance of falling down the two steps into the warm room.

Observatory to Warm Room

I thought it would be interesting to show a before and after shot. I don’t have a full panorama from before construction that includes the well equipment, but here is one from the first day of construction.

Before Construction

Here is a shot taken on June 13, with similar framing. The old well equipment is gone. The two tall tanks in the equipment room are the new trapped air pressure tanks. The doors will go on the equipment room once the new booster pump is working.

Construction Complete (mostly)

I am looking forward to getting the floor installed, the pier in place, and the scope working!

Interior Finish Started

Here is a quick update on construction progress. As of last weekend the drywall was complete and paint almost complete. I note that my prior outside shot of the observatory was lightened too much. So here is a shot, looking to the south, that has better color balance.

View to South

But the real progress is all inside now. This view looks from the observatory into the warm room. It is a mosaic, and there are artifacts from the merging process. I was considering painting the wall to the warm room white to provide some additional ambient light while observing, but ultimately decided that it would provide too much light.

Looking to the Warm Room

This view looks to the southeast corner of the observatory. The wall finish is complete, and the molding at the bottom of the wall is partially installed. The molding is white, to provide a contrast around the edge of the floor and some feeling about where the wall is when you are in the dark. On the right next to the window is an opening for an exhaust fan. With the curved roof and the need to fit over the wall, we were unable to find a roof-based fan that would work.

Partially Finished Corner

With the excitement of an angioplasty for me and eighth grade graduation for my daughter, we won’t be able to get out to see progress for a couple of weeks. By the time we do get out, the electrical will be complete, the well work done, and we should be ready to install the first telescope. I can’t wait.

Stucco Complete

The exterior of the observatory is almost complete. The stucco color finish was completed last week. The major addition was the column finish around the steel support beam for the roll off. It is a nice finishing touch. The stucco color looks different from the color chip, but it looks OK with the roof. Here is the observatory last weekend looking to the south.

View to South

Roof Complete

We’ve reached another milestone in construction. The roof is complete and the base coat of the stucco is on the building. Pictures tell the story.

This shot shows the observatory from a distance looking east. The metal seamed roof looks very nice. As light a color as could be acceptable under home owners’ association rules. The “Ultra-Cool” roof is supposed to reflect heat. I hope it does. Clicking on the picture will bring you to the gallery.

Wide to East

This view looks to the south. The color of the beam matches the roof; the doors will match as well. the missing door on the right side of the image is due to an accident in high wind that damaged the door. It slammed back and bent in the middle. It will be great to see the stucco color coat next week.

View to South

Finally, this shot shows the detail of the roof, soffit, and stucco. It is all fitting together very well. We still have all the weather stripping to do, and that’s going to be a challenge. But it’s really looking good so far.


Roof Line Detail

We are getting really close now. I’ve got to start thinking about the desk setup in the warm room, the red rope lights, and network connectivity. Now the work begins!

Roofing has Started

At our last update, the rough drywall had been completed and we were waiting for the roofers to come out and install the soffit and the metal roof. The wait for the roofers was longer than we expected, and we started on the stucco lathe before the soffit was installed. They finally started last week. It was worth the wait, as the soffit looks very nice. The soffit color is the same as the roof color.

This view is looking east, with the roof open and the soffit mostly installed. Clicking on an image will bring you to the gallery.

Roof Open

Here is an inside shot, looking northwest across the observatory toward the warm room. You can see how the soffit material wraps around the edge of the roof. Good looks and water tight too. The roof is not all the way open. Fully open there is no overhang of the observatory. This image is a Photoshop photomerge, so it has a couple of merge artifacts.

Inside the observatory

I was able to get up to the roof on the west side. This shot looks east over the lower roof. We painted the rails to match the roof color. The angle iron securing the movable roof is on both rails. There is a gap near the observatory to allow water to flow out and down rather than into the observatory. The wall above the lower roof will be covered with the metal soffit material. This is a photomerge with some artifacts.

Roof Top

Finally, there were some pretty lenticular clouds over Iron Spring and Beauty Mountains. I was able to get them in the background behind the observatory in this view looking southeast.

Clouds

We are looking forward to lots of progress over the next several weeks. Drywall and lathe nailing inspection is planned for Tuesday, so the next step on exterior and interior finish will get started. And the roof should be complete this week.

Rough Drywall Installed

We’ve reached another milestone. The roof is weather tight and we have installed the interior drywall. This also means that the rough electrical is complete. This view looks from the observatory into the warm room. As usual, clicking on a picture will bring you to the photo gallery.

View into Warm Room

All the external and internal walls are insulated. The idea is to keep the observatory isolated from the warm room, and allow the observatory to cool quickly with the roof open. This looks from the warm room into the observatory. You can see the far pier footing in the back of the observatory. No weather protection has been put in place yet, that is why there is a lot of light coming in between the roof and the walls.

View into Warm Room

Greg Staten (our contractor, owner of Staten Construction Company) and I had been very worried about the roof blowing off in a high wind. We can get winds up to 100 mph up here and with a shape like a wing, flying away would be possible and a bad thing. Greg worked with Talley Metal Fabrication in San Jacinto to come up with a solution. Talley also did all the fabrication for the building frame and the curved roof. The solution is shown in this next picture. you can see how the flange from the roof goes under the angle iron welded to the top of the roll-off beam. Very strong and secure.

Hold Down

Now for an outside shot. This is looking east, and shows the roof quite well. The roof covering is a new underlayment that is sticky on the underside and is also nailed into the roof sheathing. It is designed to reflect infrared to reduce the heat transfer to the inside of the building.

View to East

Finally, here is a wide shot taken looking south. It is really looking nice.

Wide to South

Windows In

This is a bit of a belated status report. We were out in Lake Riverside last weekend, and saw good progress on the observatory, but I haven’t written up the progress until today. We’ll be in town this weekend, so no picture updates for another week.

As of last weekend, we had the rough framing inspection completed, the roof sheathed, and now the windows in the building. You can begin to get a feeling for how the building will look. The doors on the far right are to the pump equipment room. The entrance to the warm room and observatory in the middle of the photo. The main door is not in place because the step in front is just a little too close and will need to be cut back.

View to South

Looking to the east, you can see the curve of the roof.

View to East

There is another shot in the gallery of the newly installed step between the warm room and the observatory.

We met with the electrician on Saturday and laid out plans for wiring and lighting. I plan to have red rope lights in both the observatory and warm room, with both on dimmers. There will be regular lights in both rooms, and plenty of sockets in the walls.

Saturday night and Sunday were very windy, with a steady wind of 20 mph and gusts up to 45 mph. As far as I could tell, the roof wasn’t budging. It is being held down by four very sturdy straps, but there was no evidence of movement even in large gusts. That is reassuring.

There has been quite a bit of progress since last weekend. On Monday, the roofers came and put the initial covering on the roof. The steel fabricators came out and welded the hold-down “L” set up on the beams and the roof itself. This set-up will prevent the roof from being blown off in any position, so we don’t have to rely on a tie down. I wrote about my concerns in an earlier post. The rough electrical went in on Wednesday, and, with the roof now water tight and passing inspection on Thursday, the insulation on Friday. The water tight aspect is fortuitous, as it has rained a quarter inch this evening (April 10).

The coming week could bring the soffits from the roofing company, drywall inside, and the beginning of the work on the exterior stucco. Lots of progress! There will be pictures next week.