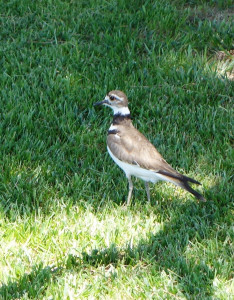
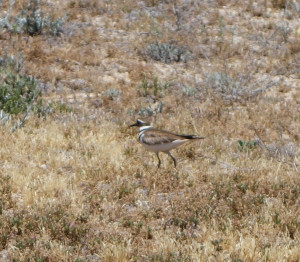
Out at the desert house, a pair of killdeer have moved in. These are ground nesting birds, and this pair have selected a spot on the east side of the property. This is much better that the first pair that showed up two years ago who put their nest in the driveway.
Heritage Winery Visit
Back in March, I spent two weeks in India (that was the main reason I missed my monthly post last month). When I was in Bangalore, my host took me to the Heritage Winery. The Winery is located about half way from Bangalore to Mysore along the Bangalore-Mysore Road.
We had a pleasant drive down to the Winery, without bad traffic it being a Saturday morning. The turn off to the winery is well marked, but it is a dirt road. The facility is clean and well maintained. This is the main entry sign.
Before the tour, you can watch an informative video on the company, wine making in general, and Heritage’s products. Their primary product is fortified wine. They purchase most of their grapes, ferment the grapes in stainless steel containers, and then blend the wine with grain alcohol and sugar to get to the desired taste and 16% alcohol content. The also make a “fizzy wine” which is a carbonated wine. They are just beginning to produce varietals. I tasted a cabernet, a shiraz, and a chenin blanc while I was there. All three were decent.
Here is the video presentation area with a big picture of the founder.
The tour takes about 20 minutes. You get to see the production facilities (they were doing a bottling run while I was there). No pictures were allowed inside of the facility. Here is a picture of our tour guide and the general manager.
After the tour, we visited the vineyard at the back of the facility. While they do purchase the grapes for their wines, it wouldn’t be much of a winery tour if you didn’t get to see grapes.
The grapes were nearly ripe and quite tasty.
The vineyard had a couple of dogs wandering around in it. One of the employees was also walking around banging a pan to keep away the birds.
After the tour and our walk about in the vineyard, we had a very nice lunch. They a planning on expanding the facility and to offer more food and entertainment. The new facility is under construction and looks like it will be very nice.
On our way back to the highway, we saw a group of goats and there was a very cute little goat. Who doesn’t like a cute little goat?
Astronomy Software – Part 3: Image Processing
This is the third and final in a series of posts on astronomy software. The first post covered mobile software and the second planning and imaging. This post deals with image processing software.
- MaximDL
When I first started imaging, Maxim was my go-to program for data reduction (removing noise, optical train artifacts, and chip artifacts from an image) and image combination. It has a strong set of tools and a fairly easy workflow. It also has the advantage of not being another tool as it is a premier camera control and image capture tool as well. I used Ron Wodaski’s bloom removal tool as I have an ST-10 and blooms are an issue for me. - CCD Stack 2
CCD Stack 2 provides a very intuitive way to understand data reduction and statistical combination of images. You can easily browse through you stack of sub frames to identify bad frames. It has excellent bloom removal. The options for statistical noise removal are excellent. There are tools to automate the processing flow, but I have not used them. - PixInsight
PixInsight is simply an amazing piece of software. Coded from the ground up as an end-to-end astronomical image processing tool, the depth of functionality and tools available for images are excellent. I now do essentially all of my image processing in PixInsight. The data reduction and combination is a little labor intensive, but there are scripts (which I haven’t tried) that can help automate the flow. The tools for gradient removal, background neutralization, color balance, and contrast adjustment (HDR transformation in particular) are absolutely invaluable. I cannot say enough about the quality and capabilities of this tool. The learning curve is steep, but worth the effort. It is multi-platform, available on Windows, Max, and Linux 64-bit platforms. - Photoshop
No discussion of astronomical imaging programs could be complete without mentioning Photoshop. This highly-capable general purpose image editing tool is a professional standard. Many tutorials have been written on using Photoshop for astronomical image processing so there are many resources for learning how to use the tool. For my use, PixInsight, with its large array of astrophotography-specific capabilities, has replaced most of my use of Photoshop. But Photoshop is clearly a top-line tool.
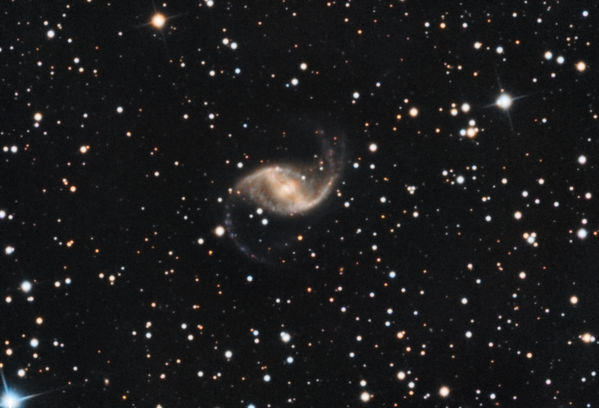
Image: NGC 1530
After the rush of holiday activities subsided, I managed to get one night’s worth of imaging done on December 30th. My target was NGC 1530, a barred spiral galaxy in the constellation Camelopardalis. It is located near the north celestial pole and only reaches 48° altitude at transit. I started imaging when it was about 43° altitude. It is fairly dim at magnitude 12.5 and small, with a major axis of 1.8 arc minutes.
The night was dry and cool. The temperature fell from about 45° F at sunset to about 29° F when I shut things down at 1:30am. The dew point was below 10° F so dew was not a problem. Set up and imaging was fairly uneventful. Thankfully everything worked (unlike the last time I was out, but that’s a different story).
The image was taken with a Planewave CDK 12.5 scope and an SBIG ST-10XME camera on an Astro-Physics AP1200 mount. I took 150 minutes of luminance and 45 minutes each of red, green, and blue in 5 minute sub-exposures. Data capture and camera control was done with Maxim DL. Automation from CCD Commander. (See my post on planning and imaging software.) I calibrated and processed the data in PixInsight.
With this dim object I could have used more exposure time. The color is a little noisy. Overall I think it is a nice image of an interesting galaxy. A full sized image is in the photo gallery.
Missed E-mail: Observatory Plans
I received an e-mail this morning asking for plans for my observatory.
I do have the plans and am willing to share them.
When I went to forward the email to my “real” e-mail account, I neglected to copy the sender. So I don’t have the e-mail address of the sender and cannot respond.
If you are that person, please contact me again and we can discuss sharing of the architectural drawings.
Astronomy Software – Part 2: Planning and Imaging
This is Part 2 of my write up on Astronomy Software. This post describes the software I use for planning and imaging. Image processing will be in Part 3. Most of the software I use for observing and imaging is PC-based, running on Windows.
Planning
- TheSkyX Pro
For planning and executing observing and imaging runs, I use Software Bisque’s The Sky X Pro. To find imaging objects, with the planetarium software time set just after the start of my imaging time, I run an advanced query (from Manage Observing List) that selects NGC objects above 40 degress with a minor axis > 5. From that list I look at each item and select the best one for the night, both for how it looks and when it will transit. I also use TheSky to point the telescope when preparing for an imaging run.
Automation
- CCDCommander
CCD Commander is an excellent script-based imaging automation tool. The learning curve is not steep. While there aren’t all the bells and whistles of other automation software, the software is quite capable and much less expensive. I don’t do remote imaging, but rather have the automation so I can sleep while my images are taken. - PinPoint
Pinpoint is an amazing plate solving tool. It quickly identifies the exact location in the sky where the scope is pointing. This is crucial for both automation and easy imaging even if you aren’t automated. The software is written by Bob Denny of DC3 Dreams, who also produces high-end automation software. - FocusMax
Focusing is not only crucial, without some form of automation it is tedious. Steve Brady and Larry Weber developed this excellent focusing tool using the idea that you can use the focus characteristics of your telescope and the size of an out of focus star to calculate the focus point. It is fast and accurate. As of this post, it is under active development. I’d recommend using the focus settle feature, it takes a bit longer but is more accurate. The “Find Star” capability got me introduced to how much plate solving and automation can increase your imaging throughput and reduce frustration.
Camera Control
- MaximDL 5
MaximDL is the gold standard in image capture and camera control. It is well integrated with a wide variety of automation software and has extensive camera support. - ASCOM
ASCOM is a set of standards and a software framework for managing communications between sofware on your PC and your devices. It is the core of the mount / camera / focuser / rotator automation. - AstroPhysics V2 Driver
As an AP900 and AP1200 owner, I am a big fan of Ray Gralak’s AstroPhysics drivers. There are many useful features and the current release is rock solid. He is also the author of PEM Pro, a periodic error measurement and polar alignment tool. - Planewave Telescope Control and Optec Pyxis Control software.
Planewave’s control software for scope and focuser is crucial for any type of imaging. When I first bought the scope I had a couple of issues that were solved in the middle of the night on a Saturday – excellent customer service. I use a Pyxis 3″ rotator and driver software is critical. All of this software is ASCOM compliant.
Most, if not all, of this software can be used on a trial basis. That gives you a chance to see if it will work for you before you buy.
Astronomy Software – Part 1: Mobile Software
It has been quite a while since I have posted about astronomy and astrophotography. With yet another – holiday this time – weekend near the new Moon with cloudy skies, I thought it would be a good idea to write about the astronomy software I use for planning, general viewing, and imaging.
This first software post will focus on iOS applications. Future ones will cover the PC software I use. There are several iOS applications that I find very useful.
Darkness is a great app that gives you Sun and Moon rise/set times, Moon phase, and all the key twilight numbers. It is good to know astronomical twilight as that is when you can really start observing or imaging.
SkySafari is a very high-quality planetarium app for the iPad and iPhone / iPod. I use the standard version for basic object location but they also have enhanced versions that have features like telescope control. They also have Andriod versions.
Star Walk is very cool planetarium program that you can hold up to the sky and it will orient the image to show what you are looking at.
Emerald Sequoia has many interesting time-related apps. I find Observatory interesting for seeing where the Sun, Moon, and planets are on any day and time and Time which gives you exactly accurate time by contacting NTP servers.
Lohagad Fort Trek
As my earlier posts from this summer indicated, I have been doing a fair amount of travelling for work. My most recent trip was to see our service provider Tata Consultancy Services (TCS) in Mumbai. Wednesday of the first week I was there was a national holiday for Mahatma Gandhi’s birthday. Being the fine group they are, the team organized a trek (we Americans would call it a hike) to Lohagad Fort.
For purposes of personal privacy, I won’t name any individuals or post any personal photographs. But the team that came along were great sports, we had a fine trek leader, and it was extremely well organized. I cannot thank the team there enough.
Lohagad Fort is about 117 kilometers or roughly 70 miles from where I was staying in Mumbai. The drive was about three hours. It is located just off the Mumbai to Pune Expressway. Lohagad, meaning “iron fort,” and Visapur are a set of two forts build on large rock formations and separated by a saddle pass between the two. Lohagad is the easier hike, although it was plenty of work for me.
We parked a mile or so past the Malavali railway station on south side of the expressway. The trail is mostly a dirt road, not in good condition for driving, but fine for trekking. Once one gets a ways up the road, you get a good view of the destination.
Trekking shortly after the monsoon and in a season with some rain makes for a very pretty hike. There are many little waterfalls and everything is very green.
Travel, travel, travel
As I said in my post at the end of August, a road trip was coming. There have been several more trips (one ongoing now) that have not allowed me the time to write a proper post.
When all this traveling is done, I will have a proper update.
Road Trip Coming
It has been a busy August. We traveled to Upper Michigan to see my parents for a week. Getting there was an adventure, and not of the good kind.
There were thunderstorms south of Chicago so incoming flights were delayed. our flight was scheduled to leave at 6:50 pm and we boarded the plane at about 10:15pm. We sat for quite a while. They finally closed the doors, but then informed us that there was a mechanical issue with the cargo door. We then learned that that final delay pushed the crew beyond their maximum working hours under FAA regulations. So we all got off the plane.
The airline booked us into a hotel in Skokie. We finally got to the room (smoking, not non-smoking and it reaked of tobacco) at 1:15 am. We were up early and at the airport around 9am. Our flight finally left after noon. It was delayed 19 hours. It took longer to fly from Los Angeles to Marquette than is does to fly from Los Angeles to Mumbai.
The visit with my parents was good. Pleasant weather, many cousins around, good fun for all.
After catching up at work, I am off next week to take my older daughter to college. She is attending Gonzaga University in Spokane, Washington. We are planning a nice, scenic drive up US-395. Our first night will be in Alturas, California and the next day we make it to Spokane.
I had planned to return on a slightly more eastern route through Nevada. Thankfully, I was told about the Burning Man festival being held at Black Rock City through Labor Day weekend. Apparently, the traffic from the end of the festival turned a seven hour drive from Reno to Los Angeles into a 10 hour drive. I have now planned a different route.
On the return, I’ll leave Spokane mid-day and drive to Bend, Oregon. From Bend, I’ll head south on US 97, joining I-5 at Weed, California. Then a long day driving south on I-5 to Los Angeles.


You must be logged in to post a comment.