Keeping up with my pace of an image every nine months or so, I finally got some data worth processing over the 4th of July weekend. I had high hopes for the weekend because with the 4th being on a Thursday, it was a four-day weekend almost exactly at the new Moon. Mother Nature intervened to reduce my imaging time, but I got enough data for an image.
My target was the Ring Nebula, or Messier 57. I wanted to image the extended, faint nebulosity surrounding this fairly bright planetary nebula. The night of July 4th I got 2 hours of hydrogen alpha (Ha) data in 12 10-minute sub exposures unbinned. On July 5th I got 35 minutes each of red, green, and blue in 7 (each) 5-minute sub exposures binned 2×2.
I had planned to get some luminance data and more Ha on the 6th, but it was cloudy at dusk. It was probably going to clear, but with astronomical twilight at 9:45 PM and M57 transiting at 12:45 AM, I decided to take my calibration frames and call it a night. Perhaps I’ll get more data later this summer, but I decided to process what I had.
My initial approach was to create a synthetic luminance image from the RGB data, combine that with the Ha data for a final luminance, and then add color from the RGB. Note that my RGB data is binned 2×2, so I don’t have the full definition of my camera for anything but the Ha data. My second approach was to also add Ha to the red channel. That produced the best result.
Overall, the image is noisy because there is limited data and everything but the Ha was taken at 2×2. I was somewhat aggressive with ACDNR noise reduction. I admit up front this is far from a perfect image. But it is what I could get with the data I have.
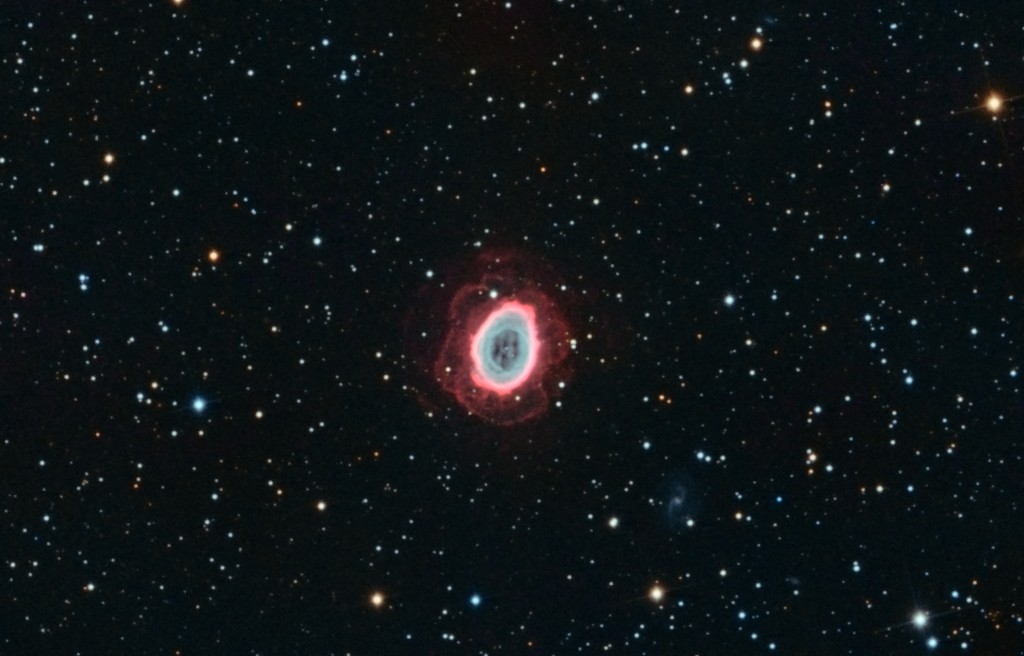
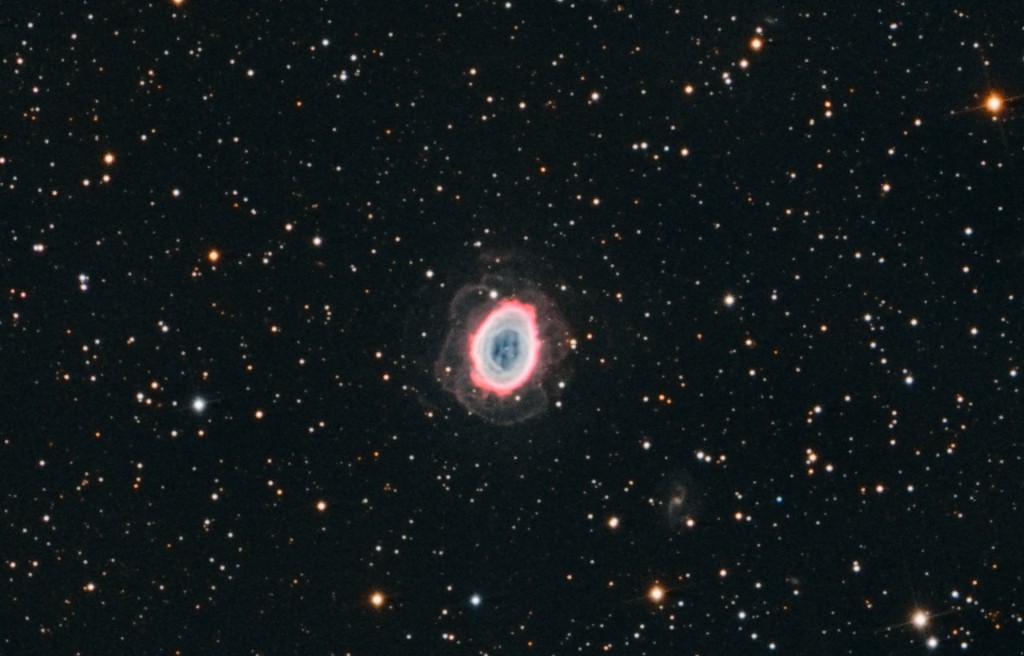
Here is the final image
Here is my initial pass at processing
What follows is a more detailed description of the processing steps.
Per my earlier post on biases and darks, I had 200 biases, 36 1×1 600 second darks, and 52 2×2 300 second darks. It was warm so everything was taken at -10°C. The only minor change I made during image integration was to be fairly aggressive with the sigma clip factor for the RGB data, using a sigma factor of 2 for both upper and lower rejection. The Ha flat was almost 30 seconds of exposure, and had black spots when I did dark subtraction. I ended up using only bias subtraction for the Ha flats and that worked fine.
In preparing the RGB images I followed the general steps outlined in the PixInsight tutorial. I performed dynamic gradient adjustment on each frame separately. Having cropped about 100 pixels from each side, eliminating both the overlap areas from integration and some vignetting, the color balance was not too far off on the original combine.
To create the synthetic luminance, I used channel extraction to separate the RGB frames from the color balanced linear RGB image and then used pixel math to add the frames together into a new luminance image. I used the corrected RGB because that had normalized values for each channel. I created separate frames and added them because I wanted the logical equivalent of capturing the data as a real luminance image, which would be the sum of all the photons, or the sum of the pixel values on the individual frames. I could have used Convert to Grayscale, but I don’t know how that processed the pixel values and having the component frames later helped when I wanted to add the red.
I created the final luminance by combining four versions of the Ha data and two of the luminance data as an mean combine in Pixel Math. I used HDR Multiscale Transform to create each of these different versions. On the Ha, I used three, four, five, and six layers; on the luminance I used four and five layers. This gave a nice blend of the Ha details while also including better data of the stars.
This was combined with the RGB image using LRGB Combine to create a final image. While it had good definition in the extended nebulosity, it didn’t look right somehow. I decided to add the Ha to the red since that is where it belongs in the spectrum anyway.
I used the red component frame I had created for the synthetic luminance for the red and added Ha using Pixel Math. My initial addition of the Ha data completely ruined the color balance of the RGB image. After some experimentation, I added two times the Ha data to the red data, turned off normalization in Pixel Math, but adjusted the resulting data by finding a factor that made the mean of the combined data roughly the same as the mean of the green and blue data. Here is the Pixel Math expression I used:
(M57_130704_01_R1+(2*M57_130704_01_Ha_clone))*(23/42)
As you can see above, the final result is better than the first pass.


You must be logged in to post a comment.