Archive for June, 2009

h1

Another Step — Pier in Place

Monday, June 29th, 2009

Interior fitting of the observatory has finally begun. I’ve got the pier in place with the mount adapter attached. I’ve also cut the rope lights for the walls, and I will be mounting them about waist high. Here is a picture looking toward the warm room.

Pier

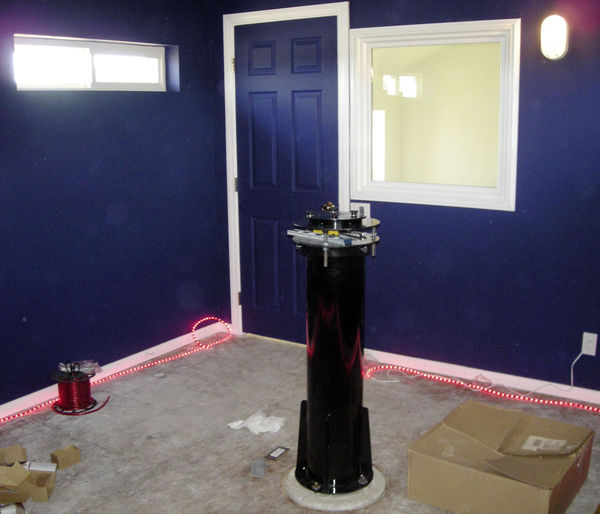
The Astro-Physics mount adapter fit perfectly onto the Sky Shed pier top. I had a little trouble setting up the rope lights, but it turned out it was just user error. The rope lights and the side lights are both on dimmers, and the rope lights work fine on the dimmer switch. There are a couple of things we need to do to get the weather stripping correct and the floor needs a good vacuum before I put the flooring in (I am using interlocking foam mats). You can see the power socket and the 2″ conduit that leads to the warm room at the base of the pier.

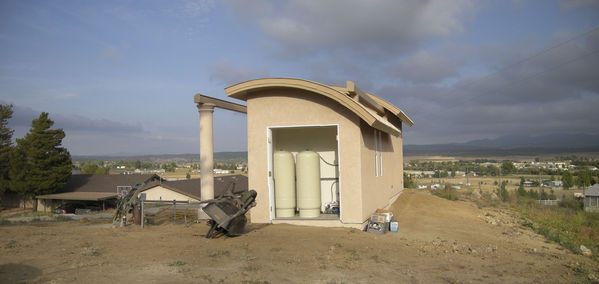
Temperatures inside were nicely below ambient until things started cooling off outside, so I am hopeful it will adapt quickly with the roof open. We had lows in the 40s and highs in the 90s.

I’d have moved the mount in but I discovered several holes in the drip line for the trees, and one underground in the yard. This bit of mischief added just enough maintenance so that I didn’t have time to move the mount and scope in, and I do want the final touches on the roof in place.

I am looking forward to the long weekend and several days dedicated time to get things set up.

h1

The Weather Brush

Monday, June 22nd, 2009

This past week, June 16 to be precise, we had our final inspection from the county. We have a signed job card and the building is official in the eyes of Riverside County. The main change from the last construction report is the addition of weather stripping, or a “weather brush” as I like to call it. It is a dense nylon brush, made for door weather sealing, that we adapted for use around the roof.

This picture shows the brush along the long side of the moving roof. Bolted into the fascia material, it forms a tight seal against the stucco. Click on the image to go to the gallery.

North Side

This view is of the west wall of the observatory. The roof moves off to the west, so this brush will press up against the wall when the roof is closed.

West Wall

The eastern end was a bit trickier. There is very little overhang and the brush needs to move over the wall when the roof opens and closes. This was screwed into place using the fascia material screws.

East Wall

There are a few minor touch up items before I begin to move the pier, mount and scope inside. I did select interior lights using an exterior light fixture recommended by the good folks in the discussion group at Cloudy Nights forums.

h1

Construction — Almost Done

Sunday, June 14th, 2009

In the last two weeks we’ve almost completed primary construction on the new observatory. The interior finish is complete, electrical is installed, and the well equipment installation is almost complete. Final inspection is planned for this coming Tuesday.

Here is the front view, looking to the south. All the finish is complete except for the equipment room doors, which are off pending completion of the well work. Not too different from a couple of weeks ago, but the locks are on the door and the exterior lights are mounted. Note the dark sky friendly downward facing exterior lights. Click on any picture to go the gallery with larger versions available.

View to South

On the inside, the finish is complete. I’ll be adding foam flooring once the final paint touch up is complete and we are past inspection. I have a spool of red rope lights to add which will be controlled by a dimmer. My current open question is what to do for interior, white, not-for-observing lighting. There are boxes for fixtures on each wall, but I am not sure what type of fixture to put up. I’d like to be able to work inside and possibly illuminate a white hanging on the wall for flats, but don’t want anything that would shine in the eyes while working.

This view looks from the observatory to the warm room. I think the white trim will help moving around in the dark and reduce the chance of falling down the two steps into the warm room.

Observatory to Warm Room

I thought it would be interesting to show a before and after shot. I don’t have a full panorama from before construction that includes the well equipment, but here is one from the first day of construction.

Before Construction

Here is a shot taken on June 13, with similar framing. The old well equipment is gone. The two tall tanks in the equipment room are the new trapped air pressure tanks. The doors will go on the equipment room once the new booster pump is working.

Construction Complete (mostly)

I am looking forward to getting the floor installed, the pier in place, and the scope working!