Rough Framing Complete

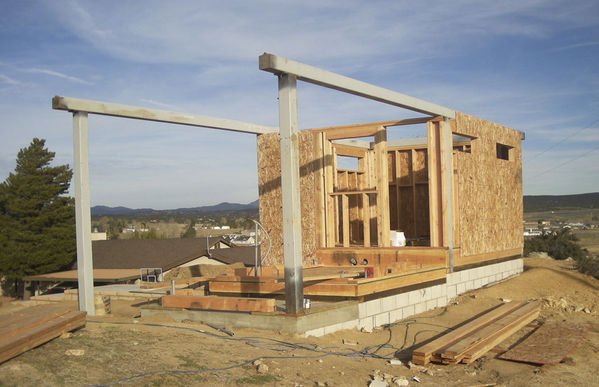
We’ve reached another construction milestone. Rough framing is complete, including the sheathing on the roof, and we have passed the rough framing inspection with only a few open items.

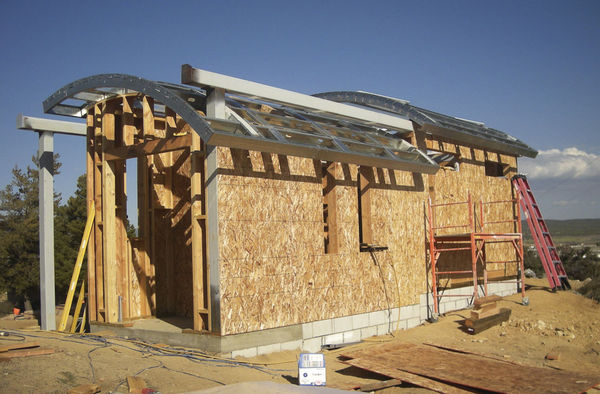
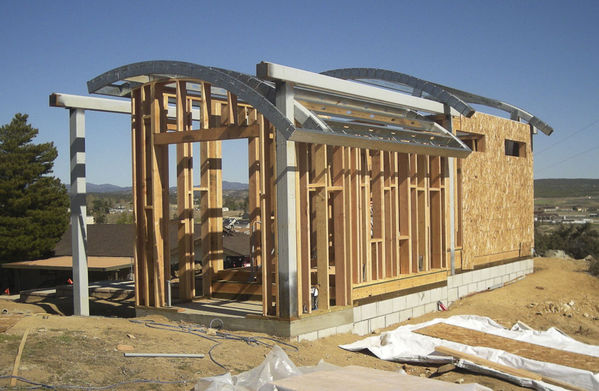
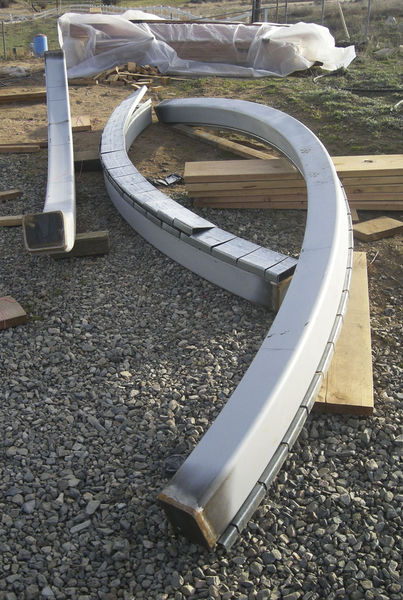
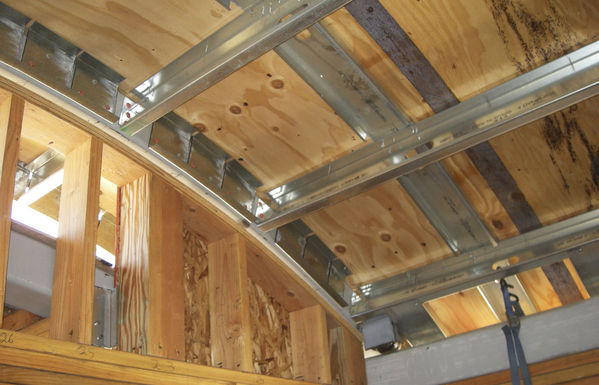
This shot shows the progress on the roof very well. You can see the curve and how the beam will carry the moving roof. One of the issues our contractor dealt with was getting the plywood to curve on the roof. The plans call for 1/2 inch plywood, but that cracked as it was bent over the steel struts that are on 24 inch centers. We used 3/8 inch plywood, certified for 24″ OC sheathing and that worked. This change, however, led the inspector to require updated engineering. (Clicking on a picture will take you to the photo gallery.)

View to East

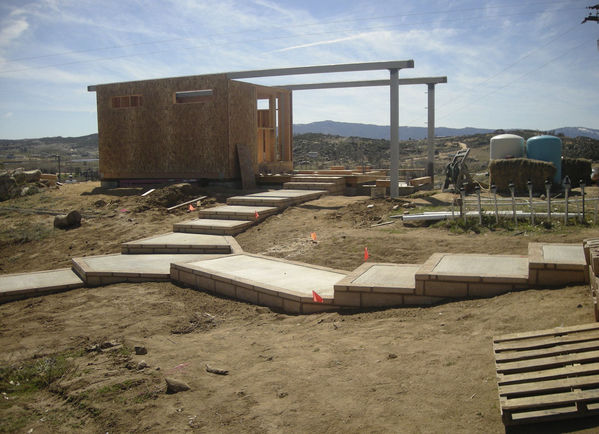
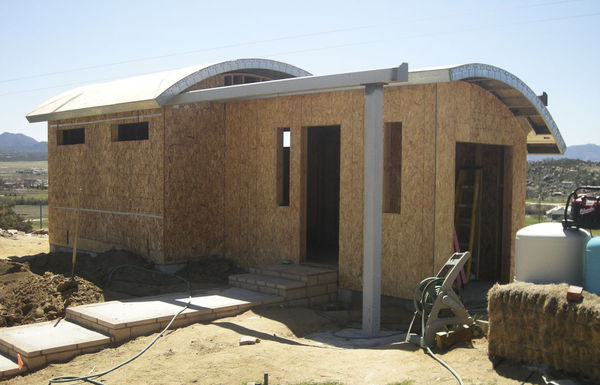
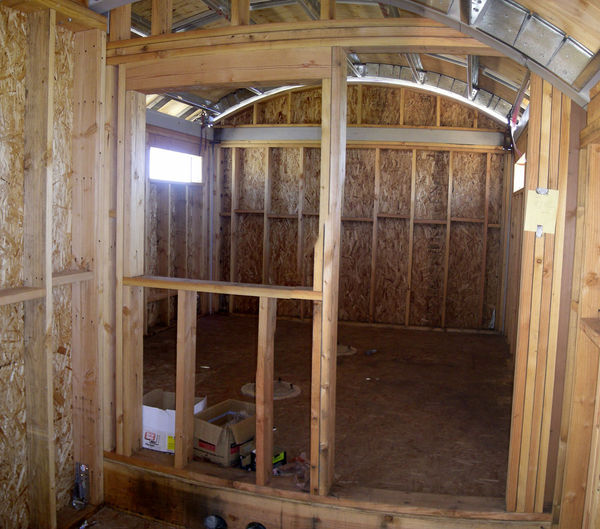
This view looks at the entrance to the building, looking south. The well equipment will go inside the small room on the far right side of the building. The warm room is inside the door in the center of the picture. Entry to the observatory will be from the warm room.

View to South

This view looks from the warm room into the observatory. The window on the left will look into the observatory, and the door on the right will open into the observatory. In the back, you can see the wall framed up to conform to the inside of the curve of the roof. One advantage of this design is that it leaves as much clearance as possible inside the observatory. This means that scopes may not need to be fully parked to clear the roof. This image is two images stitched together in Photoshop; there are some artifacts where the two images didn’t quite line up. A view looking the other way is in the gallery.

View into Observatory

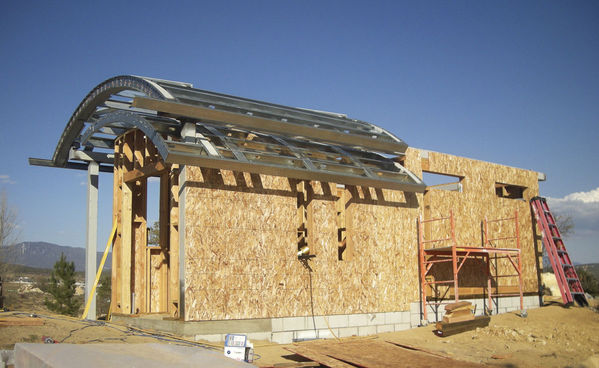
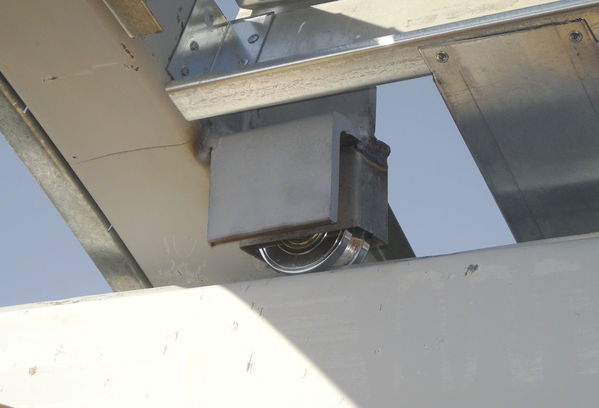
The detail on the roof framing is shown in this picture. Each strut is attached to the 6″ curved tube steel rafters. The wall is framed up underneath. There will be weather stripping at the top of the wall to keep out rain and dust.

Roof Framing Detail

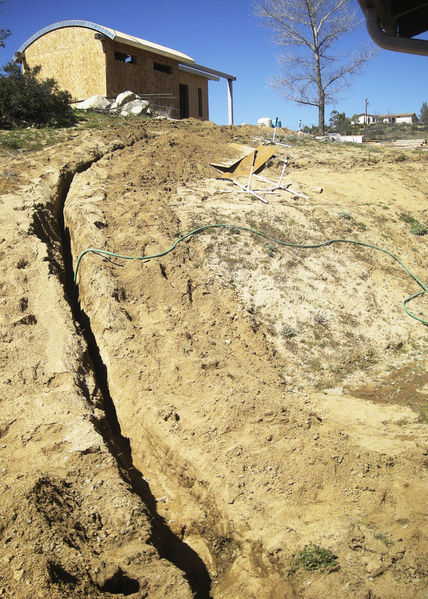
We needed to get access to power from the house. Our original plan to use the existing power feed to the pump failed because it was in too small a conduit to handle the additional wires required. Since we’ve got the ground opened, I’m going to add two 2″ conduits for network and whatever else I might need. I do have an open question as to whether I should use fiber to avoid interference with the power and to prevent ground loops.

Trench

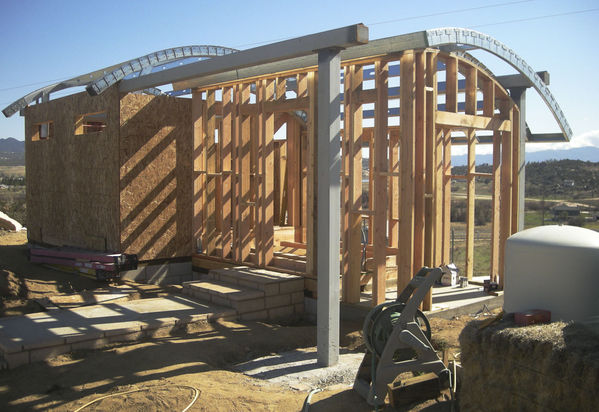
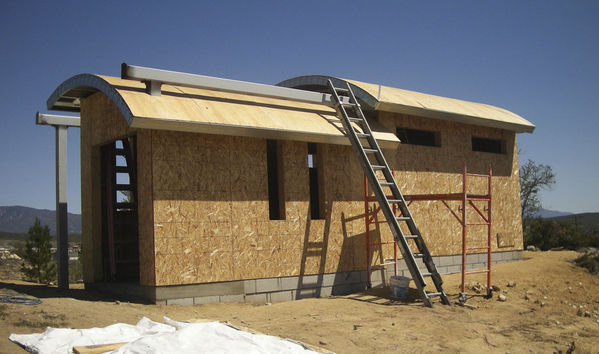
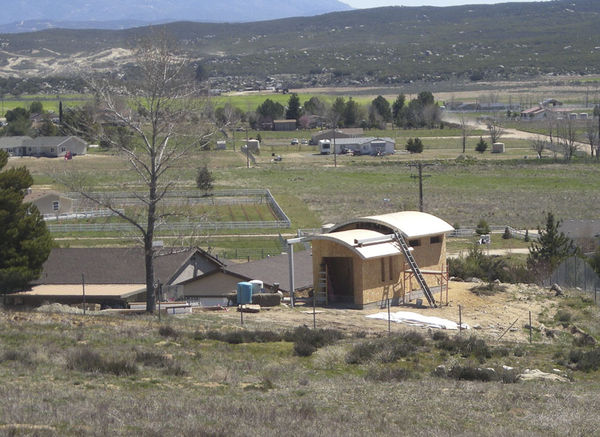
Finally, this view from up the hill shows the roof very well. The area next to the observatory will look much nicer once the well equipment is moved inside. Part of the roof of the house and garage are visible in the background.

View from Road

A full set of pictures is in the Construction Gallery.

NGC 2403 Revisited

This is a new version of an image I took back in January 2007. I spent two nights capturing data, but I have never been satisfied with the original processing. I have finally have gotten around to trying again.

On preliminary comment in self-defense here. This is a difficult object, even under dark skies. It is diffuse, with the broader areas quite dim. I was imaging in West Los Angeles, with very light-polluted skies. Much of the galaxy is only slightly brighter than the background sky glow in the city. I may have taken eight hours of data, but seeing was not that great and the signal was barely above the background.

Here is the original image. It has many flaws. First, it is mirror-flipped so the orientation is incorrect. It should have been cropped before it was processes to eliminate the lines all around the edges. It is stretched too hard and looks over processed.


NGC 2403 Original Version

Here is the revised image.

NGC 2403 Revised Version

I was much less aggressive on stretching the image. Image reduction (darks and flats) was done in Maxim DL. I aligned and stacked the images in CCDStack. I found that the bicubic b-spline resampling produced the least noise in the align process. I used mean combination to combine the subframes. Technique-wise, I created a master luminance frame and then used that to align the R/G/B frames.

Most of the processing was done in PixInsight. I did most of the enhancement work was done on the luminance image. I cropped the image, rescaled it to use the full dynamic range. This was required since the signal was very low and I had combined with a mean combine rather than a sum. A sum would have produced higher totals, but the net result is the same as a mean. I stretched the image with historgram, but did not clip it but for a small amount at the lower brightness levels.

I did try to do most of the processing on a linear version of the image, per the advice of the experts from PixInsight. While I was able to more easily get a star mask built, HDR Wavelet and other functions just didn’t work well.

With the image stretched appropriately, I copied it and did an HDR wavelet transform with a star mask applied. This was averaged with the original image. That was essentially the final luminance image.

For the RGB frames, I did a similar stretch process, attempting to create similar-looking histograms for each one. I then combined all frames into a color image using LRGB combination. I brought that image into Photoshop to adjust the color balance and then used Russ Croman’s Gradient Xterminator to flatten the background. Finally, back into PixInsight for some brightness touch up and noise reduction.

The exposure is LRGB 8 hours, 10 minutes total exposure, L = 115 min (23×5 min) + RGB 375 minutes, RGB = 125 min (25×5 min), all unbinned. The equipment: C-11 @f5.95, CGE mount, ST-10, CFW-8A, AO-7, & Hutech LPS Filter.

The Roof Moves!

A major milestone has been reached! The roll-off roof actually rolls off. Over the last week the wheels were installed and the supporting angle irons straightened so that the roof moves cleanly. In addition, the full shear wall has been put in place over the framing.

Of course, the pictures. Here is the observatory with the roof in the closed position. Clicking on an image will take you to the gallery for full-sized and other pictures.

Closed Roof

And now, the roof open.

Roof Open

Here is a close in shot of one of the four wheels that support the roof. It is welded onto the 6″ tube steel rafter.

Wheel

We are working on a solution to prevent the roof from sailing off in a high wind. We may use interlocking angle irons to keep the roof in place. I am worried about the curved roof now (a bit late!) as it will form a nice wing to create lift. The roof may weight 1,000 pounds, but the wind up here can be very strong.

Rafters Up

Our contractor, Greg Staten, had the Pettibone out at the site this past week to put the large steel rafters up on the frame. They have been secured in place, allowing the steel struts that run between the rafters to be put in place. This process was well under way by the weekend.

Here is a shot looking east, showing the shorter and narrower part of the building in in the foreground. This will house the warm room and the pump equipment. The beam over the lower roof supports the larger roof as it rolls off to the west.

Clicking on an image will bring you to the gallery where you can see more pictures and bring up full sized images.

View to East

This shot was taken from inside the observatory looking west. You can see the detail of the steel struts on the roof. Wheels will be attached to the inside of the large steel rafters to allow the roof to move. With all the steel up there the name Steelhenge keeps looking better and better. The wall will be framed up to go under the curve of the steel rafter, with weather stripping between the wall and the roof to keep water and dust out.

Click through to see the details, it’s hard to see reduced to this size.

Roof Steel Detail

This view looks down the driveway to the observatory. It does look nice in that position on the property.

Down the Drive

This shot looks at the front door of the observatory looking to the south. You can see the beam and post in the foreground that supports the roll-off roof. The pump equipment room is on the right, with the warm room between there and the observatory room. The observatory is 4 feet wider than the warm room and equipment rooms. That smaller footprint makes having the roof roll over easier.


Front View

Finally, here is a view taken from Lakeshore Boulevard, looking down the hill to the east. I have zoomed in with the camera to show more details on the building. The building is about 350 feet away in this shot.

View from Road

Things may move more slowly this week. The final struts need to go into place and I believe the wheels will be fixed to the roof rafters. Roof sheeting might be on this week. We’ll see!

Framing Started

Framing has started on the new observatory. The walls of the observatory are in place and the floor has been laid in both the observatory. The pathway from the driveway, both lower and upper, has been completed and Luis did a wonderful job. Now for some pictures.

This first shot is the artistic one. Looking up the hill to the observatory last Saturday night, February 28th. The crescent Moon and Venus were bright while the glowing sky framed the observatory on the hill. Clicking the picture will take you to the gallery with even more pictures.

Observatory, Moon, and Venus

Here is a view looking to the south.

View to South

This shot is looking east. You can see the entrance to the observatory area from the warm room, 12 inches up from the floor of the warm room. There is a window between the warm room and the observatory. There are two two-inch conduits in the wall of the warm room. Each one goes to a mount location in the observatory.


View to East

There is fine detail on the stairs going down to the house.

Fine Detail

Finally, here are three of the four steel roof rafters. The longer one is for the moving roof of the observatory. The larger roof will roll over the smaller roof of the warm and equipment rooms. All of these are six-inch tube steel and are very heavy. I feel I am ready to have a helicopter land on the roof with all this steel. This curved roof design was a great feature that Tom Jungbluth, our architect, developed, and it really adds character to the building.

Rafters

Comments and suggestions welcomed!